Show index Hide index
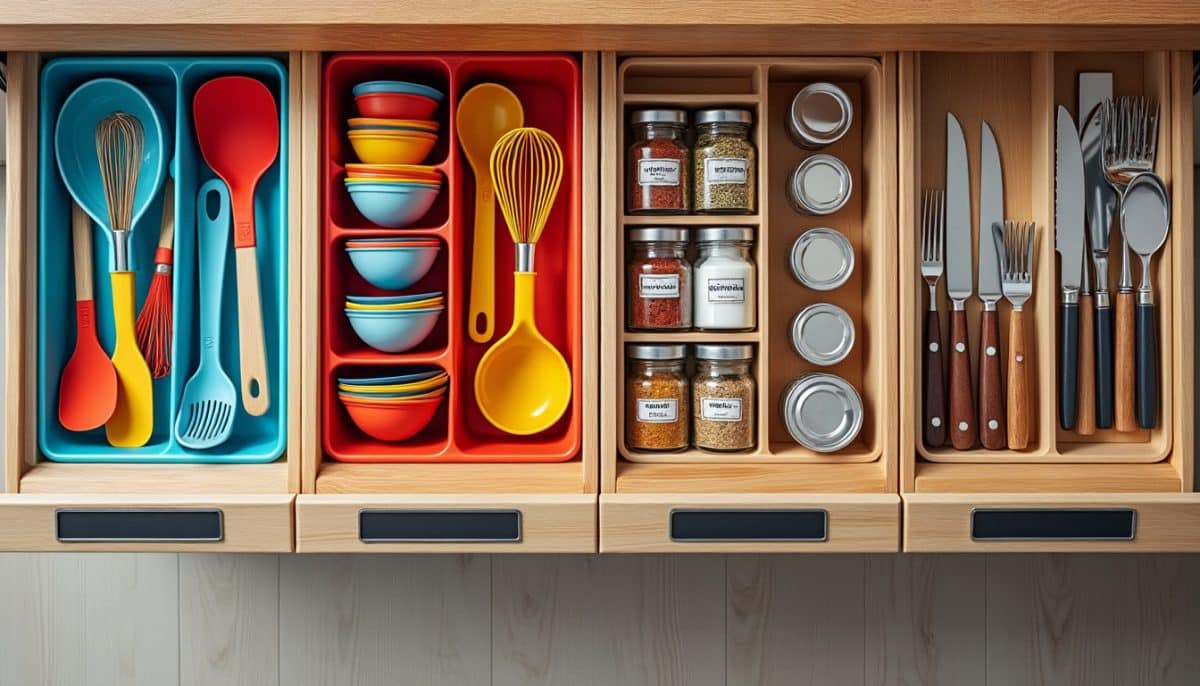
Struggling with cluttered kitchen drawers is a common frustration for many homeowners, especially in 2025 where compact spaces and busy lifestyles collide. The frustration of mismatched utensils, slipping organizers, and wasted drawer space is all too real. Yet, reclaiming this chaos doesn’t require expensive investments or complex overhauls. With only a handful of simple tools and budget-friendly materials readily available at stores like The Container Store, IKEA, or Home Depot, one can create transforming DIY kitchen drawer organizers. These projects promise quick, easy, and practical solutions, perfect for small kitchens or renters aiming to boost organization without compromising style or functionality. Imagine opening a drawer and instantly finding every utensil perfectly nestled in its place, or converting random tool drawers into streamlined compartments that fit your cooking essentials. Whether you’re tackling a weekend project or seeking quick fixes under $50, these ideas double storage and elevate your kitchen’s vibe with handcrafted charm and genius design. Unlock the potential of your kitchen drawers with custom dividers, sliding trays, and smart compartments that reflect both utility and aesthetic appeal.
4 Quick DIY Kitchen Drawer Organization Projects for Small Kitchens
Maximize your kitchen drawer potential with these four easy DIY projects that offer impressive storage gain. All require minimal skills, typically come together in under an hour, and cost less than $50, making them perfect for anyone wanting instant results and budget-friendly upgrades.
1. Custom Wood Compartment Organizer
Why it works: Tailored compartments fit uniquely sized utensils and gadgets, eliminating wasted space and keeping everything tidy.
Time: Prep 15 min | Build 45 min | Total 1 hour
Cost: Under $40 | Skill: Beginner
Materials:
- 1/4″ oak hobby boards from Home Depot
- Wood glue, sandpaper, and wood sealant (available at Wayfair or Home Depot)
- Pin nailer or instant-dry glue for assembly
- Basic measuring tape and saw (miter saw recommended)
Steps:
To read Christmas Window Painting: DIY Tutorial and Ideas
- Measure drawer interior; subtract 1/8” from width and length for a snug fit.
- Cut boards into compartment sizes tailored to your utensils’ dimensions.
- Assemble using wood glue and a pin nailer, ensuring square joints for a professional finish.
- Seal the wood with a moisture-resistant finish to withstand kitchen use.
Make it work: Customize compartment sizes for large spatulas or small spoons. Swap oak for budget plywood to save money. Non-permanent glue options allow easy removal for renters.
Discover detailed guides and inspiration from sources like Fix This Build That and MyMyDIY.
2. Sliding Tray for Shallow Drawer Division
Why it works: Adds a secondary level inside deep drawers, keeping frequently used utensils within easy reach and preventing pile-ups.
Time: Prep 10 min | Build 30 min | Total 40 min
Cost: Under $35 | Skill: Easy
Materials:
- 1/4” plywood or mDesign drawer organizers for layering
- Small shelf supports (find at The Container Store or IKEA)
- Wood glue or superglue
- Measurement tools
Steps:
- Measure drawer width, making tray 1/8” narrower for smooth sliding.
- Build tray half the drawer’s length; smooth edges with sandpaper.
- Position shelf supports to fit tray at least 1/8” below drawer open edge.
- Place and adjust until tray slides seamlessly.
Make it work: Use rubber feet from Rubbermaid to enhance sliding. For renters, avoid permanent fixtures by opting for removable shelf supports.
To read Thanksgiving Centerpieces: DIY Ideas for Your Table
Get inspired by Yahoo Creators’ weekend projects and practical tips at Cozy DIY Home.
3. Upright Divider Rack for Bakeware and Cutting Boards
Why it works: Storing flat items upright saves drawer space and prevents frustrating stacking struggles.
Time: Prep 20 min | Build 40 min | Total 1 hour
Cost: Under $50 | Skill: Beginner
Materials:
- 3/4″ plywood (available at Home Depot or Wayfair)
- Shelf support pegs (ClosetMaid or Simplehuman)
- Screws and mounting brackets
- Basic tools: drill, saw, screwdriver
Steps:
- Cut plywood to cabinet depth, slightly taller than drawer height.
- Drill holes matching existing shelf support patterns.
- Screw brackets securely inside cabinet.
- Place baking sheets and cutting boards vertically with custom spacing.
Make it work: For renters, use removable adhesive strips to secure dividers. Vary height and width to adapt to kitchen pan sizes. Check variations at Angela Marie Made and From House To Home.
4. DIY Flip-Down Tray for Pens, Notes, or Tablets
Why it works: Adds hidden storage under upper cabinets, keeping counters clear while keeping essentials within reach.
To read Christmas Kitchen: Small Space Decorating That Works
Time: Prep 15 min | Build 30 min | Total 45 min
Cost: Under $30 | Skill: Easy
Materials:
- Thin plywood or 1/4-in acrylic (available at Home Depot)
- Small hinges and cabinet magnets (The Container Store, Wayfair)
- Foam liner or placemat for tray base
- Basic screwdriver, drill, measuring tape
Steps:
- Cut tray to fit under chosen cabinet space.
- Attach hinges along one side and magnets for closure.
- Line tray with foam for grip and cushioning.
- Mount tray securely under cabinet with screws.
Make it work: Convert it into a tablet holder for easy recipe viewing. Use removable tape versions of magnets for rental kitchens. Inspired by Family Handyman’s clever ideas.
Each project combines simple materials from trusted retailers like Home Depot, IKEA, and The Container Store, with practical techniques for beginners. Using drawer organizers like those from Rubbermaid and OXO can complement these DIY solutions, further enhancing function and style. These projects respect the constraints of small kitchens and tight budgets, providing instant outcomes that cater to busy families and small space dwellers alike. Pin these actionable ideas to save for your next weekend kitchen makeover and turn disorganized chaos into dazzling order! ⭐⭐⭐⭐⭐