Show index Hide index
- 9 Halloween Nail Tutorials That Look Professional and Are Easy to Master
- Why DIY Halloween Nails Work Wonders for Your Look
- Step-by-step Breakdown of the Best 9 Halloween Nail Designs to Try Now
- Variations and Customization Tips for Every Skill Level and Budget
- Common Pitfalls and How to Fix Them for Perfect DIY Halloween Nails
- Why Halloween Nail Art Remains a Must in 2025
- What to Do Next: Try, Share, and Explore Halloween Nail Art
- Helpful Answers for Your Halloween Nail Questions
Halloween is right around the corner, and adding a striking nail art design can instantly elevate your spooky season look. Imagine turning heads with nails that scream creativity and polish, all achieved at home without the hefty salon bill. From eerie spider webs to ghostly glimmers, these 9 professional-looking Halloween nail tutorials deliver eye-catching results that are surprisingly quick and easy to master. Whether you’re prepping for a haunted party or just want to embrace the festive spirit daily, these designs harness the power of popular brands like OPI, Essie, and Sally Hansen to make your manicure stand out. Get ready to become your own nail artist this season with techniques that combine style and spooky flair to perfection.
9 Halloween Nail Tutorials That Look Professional and Are Easy to Master
Get ready to transform your nails into mini Halloween masterpieces with these 9 tutorials that deliver impressive, salon-quality results at home. The secret? Using premium polishes like CND and China Glaze alongside a few simple tools to create designs ranging from haunting skulls to delicate cobwebs. For example, the iconic Half Moon Cobweb Nail Art can be completed in just 30 minutes: start with a sleek black base, then add fine white lines curving like a spider web around the moon-shaped negative space near your cuticle. Don’t forget quick-dry topcoats from Butter London to seal your work for all-night wear!
Focusing on easy-to-follow steps and modest supplies means you don’t have to be a pro to achieve stunning Halloween nails. Grab your favorite brands like Orly or Nails Inc., a thin nail art brush, and some patience. Ready to get spooky with style? Let’s dive into precise, actionable tutorials that you can replicate or customize depending on your vibe.
Why DIY Halloween Nails Work Wonders for Your Look
Not only are DIY nails budget-friendly, saving you upwards of $50 per salon visit, but they also allow you to inject your personality into every design. Science backs this self-care act: engaging in creative hobbies reduces stress and boosts confidence, which is exactly what a festive manicure does! Viral videos and trending Pinterest boards are full of similar looks, proving that homemade does not mean amateur. Plus, using trusted nail polish brands ensures your nails stay vibrant and chip-free throughout your Halloween celebrations. So, get set to try out designs that have already enchanted thousands.
Step-by-step Breakdown of the Best 9 Halloween Nail Designs to Try Now
Each tutorial below includes all you need — from color combos to brush movements — for a finished look that feels professional yet accessible.
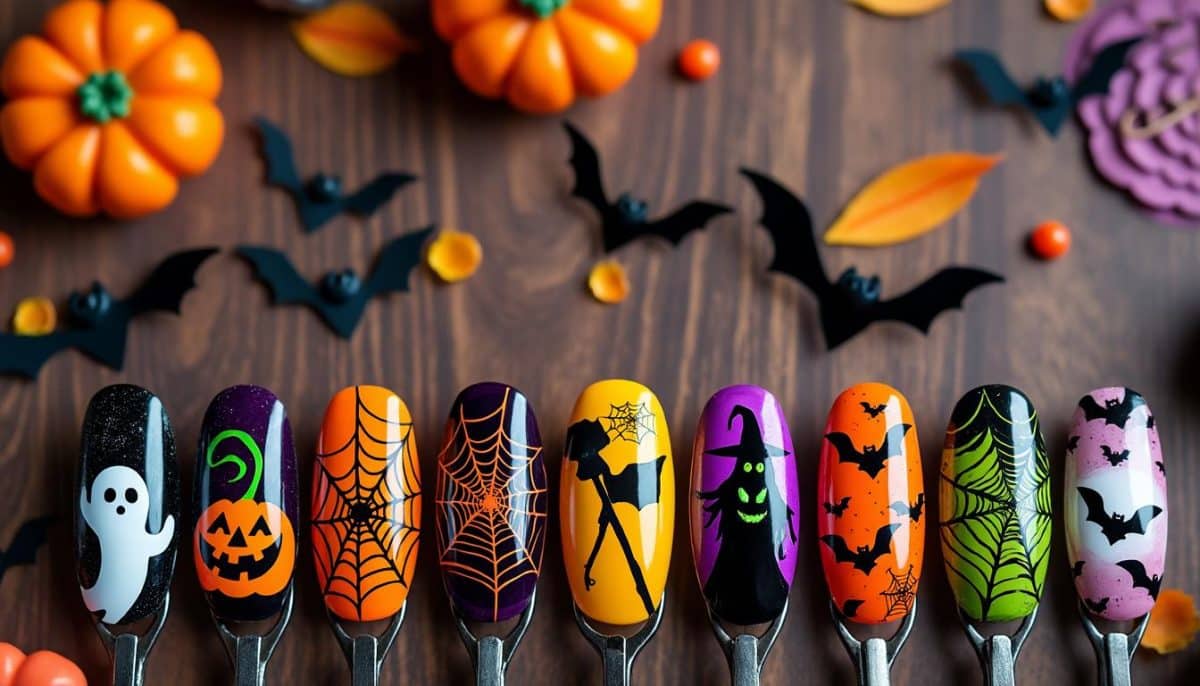
- 🕷️ Scary Spider Halloween Nails: Paint a matte black base using ILNP polishes, then add a shiny spider silhouette with a fine brush dipped in white or silver polish.
- 🌙 Half Moon Cobweb Nails: After a base coat, create the half-moon shape near cuticles with tape, paint black on tips, then overlay delicate webbing lines.
- 🐈⬛ Black Cat French Tips: Use a nude or clear base, paint classic French tips with OPI black polish, then add tiny white cat faces on a finger or two for a playful touch.
- 💀 Glowing Skull Art: With Sally Hansen glowing polish, outline skulls using a fine black pen or brush for an eerie glow effect after lights dim.
- 🦇 Bat Silhouettes: Create simple bat shapes over dark purple or black bases using a stamping kit or steady hand brush strokes.
- 👻 Ghost Nails: Paint nails white, add black oval eyes and mouths for cute or spooky ghost faces, plus a glossy topcoat.
- 🕸️ Spider Web Splatter: Flick white polish over a black base for a random web pattern, then refine with linear details.
- 🎃 Pumpkin Patch: Use bright orange from Essie, add green stalk and black smiley faces for a classic Halloween vibe.
- 🔥 Mystical Flame Nails: Blend gradient reds, oranges, and yellows using Butter London polishes, then draw flame tips for fiery nails.
For detailed tutorials with visuals, check out links like this YouTube guide and 20 Step-by-Step Halloween Nail Tutorials for inspiration and professional techniques.
To read Christmas French Tips: Classic Manicure with a Twist
Variations and Customization Tips for Every Skill Level and Budget
Whether you’re a beginner or a seasoned nail enthusiast, these designs offer flexibility. Don’t own a stamping kit? Use fine-tipped brushes or even toothpicks. Prefer gel over regular polish? Brands like Morgan Taylor and CND have excellent gel options for longer-lasting results.
On a tight budget? Skip pricey supplies by substituting with a sharpie for outlining or using tissues soaked in alcohol for the Newsprint Nail Art effect—where print transfers onto your nails for a spooky, vintage vibe.
Want to up your nail game? Experiment with glittery topcoats or rhinestones to give your designs that extra pop. Brand choices like China Glaze or ILNP shimmer polishes bring high-impact effects without complicated steps.
Common Pitfalls and How to Fix Them for Perfect DIY Halloween Nails
Getting bumpy or uneven nails can frustrate even the most patient. The trick: always prep nails by buffing and applying a base coat to smooth surfaces and protect nail beds. Allow each layer of polish to dry thoroughly—rushing leads to smudges or dents.
Struggling with symmetrical designs? Tack painters tape or nail guides for straight edges, especially in tips or half-moons. For freehand details like spider webs or skull eyes, practice on paper first to steady your hand.
Last-minute Halloween plans? Press-on nails are lifesavers, offering professional looks fast, as shown in this useful Nicole Bitchie tutorial.
Why Halloween Nail Art Remains a Must in 2025
This festive manicure tradition continues to evolve, influenced by viral TikTok designs and Pinterest boards packed with fresh ideas every season. It’s not just about aesthetics—Halloween nails serve as self-expression and conversation starters at parties.
To read Almond Christmas Nails: Shape-Specific Design Guide
Historically, themed nail art gained traction globally as nail care advanced, integrating sophisticated tools and long-lasting formulas like Nails Inc. gel polishes. In 2025, innovations include augmented reality apps that help you preview designs before committing. The future leans toward customizable, eco-friendly nail products that maintain style alongside sustainability.
Halloween nails perfectly complement your costume and décor efforts, which you can explore further for party planning ideas and seasonal food recipes at Halloween Food Ideas and creative costume inspirations at Creative Halloween Costumes.
What to Do Next: Try, Share, and Explore Halloween Nail Art
Ready to give these tutorials a go? Gather your favorite brands like OPI, Essie, and China Glaze, pick your design, and carve out 30-60 minutes for self-expression with a spooky twist. Don’t forget to share your creations on social media and pin your favorites for later inspiration! Dive into more nail art inspiration by visiting Halloween Nail Art Tutorials on Pinterest.
Helpful Answers for Your Halloween Nail Questions
How long does it take to complete these Halloween nail designs?
Most designs take between 30 to 60 minutes, including drying times, depending on complexity.
Can beginners achieve professional results?
Absolutely! Using step-by-step guides, popular polishes, and simple tools makes it easy to get salon-worthy nails at home.
What are the best brands for long-lasting Halloween nail polish?
Top picks include OPI, Sally Hansen, Butter London, and CND for durability and vibrant color.
To read Nails Christmas Designs: Complete Inspiration Gallery
Are there quick alternatives to hand-painting designs?
Yes! Press-on nails or stamping kits are excellent for fast, professional-looking results.
How can I protect my nail art to last through Halloween parties?
Apply a high-quality topcoat, reapply after a few days, and avoid harsh chemicals to preserve your design and shine.