Show index Hide index
- 5 Easy Cardboard vs Vinyl Window Silhouettes: Best Methods and Top Picks
- Deep Dive: Why these three approaches win for window silhouettes
- 5 Durable Vinyl Halloween Window Silhouettes for Long-Lasting Spooky Style
- Why choose vinyl for window silhouettes?
- 5 Step-by-Step DIY Cardboard Silhouettes: Tools, Templates, and Secrets
- Essential tools and materials
- 5 Pro Tips for Installing Vinyl and Cardboard Silhouettes Safely and Removably
- Surface prep and adhesive choices
- 5 Budget-Friendly Shopping and Supply Sources for Halloween Window Silhouettes


Opening: Transform bare panes into a haunting focal point with clever Halloween window silhouettes made from cardboard and vinyl. This guide answers the most practical questions first, then drills into materials, methods, and where to buy supplies so the finished display lasts and looks professional. 🎃✨
5 Easy Cardboard vs Vinyl Window Silhouettes: Best Methods and Top Picks
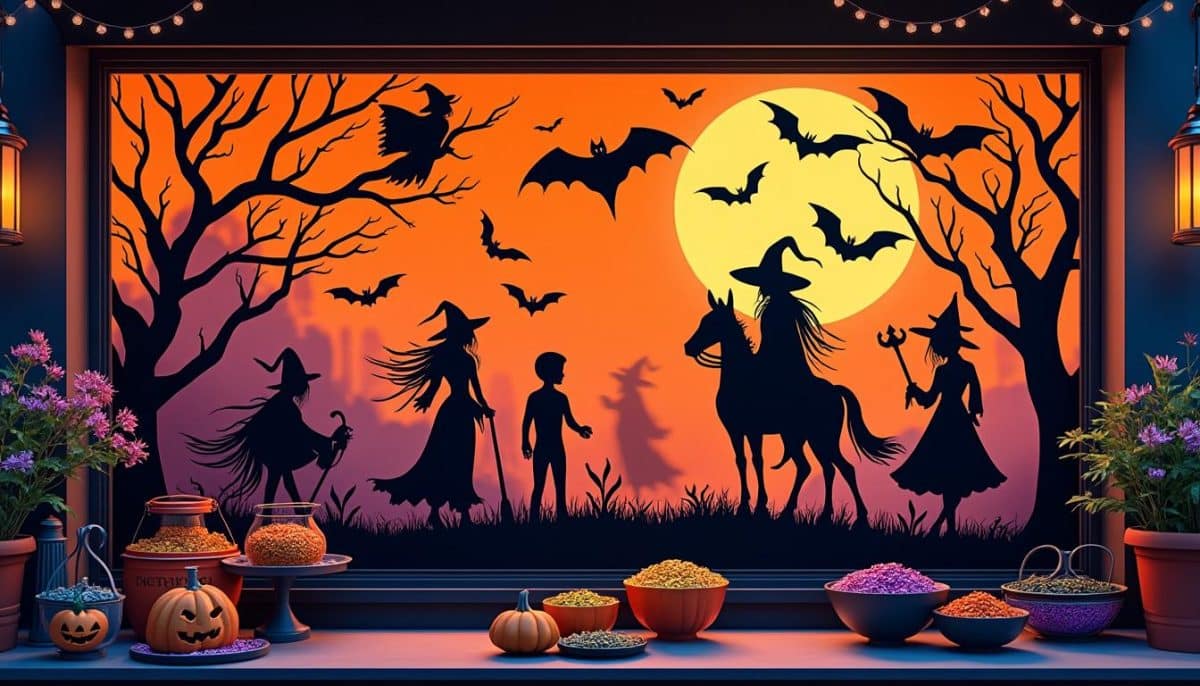
Answer: For Halloween Window Silhouettes Cardboard and Vinyl, the best approaches are: Black Foam Board Cutouts with Projector Tracing, Removable Matte Adhesive Vinyl Sheets, and Pre-cut Removable Window Decals (adhesive clings). These solve the core problems of visibility, removability, and nighttime contrast for front-facing windows. 👻
The best Halloween window silhouettes methods are: Black Foam Board Cutouts with Projector Tracing, Removable Matte Adhesive Vinyl Sheets, and Pre-cut Removable Window Decals. Each choice targets a different need: structural presence and backlit drama (foam board), crisp long-lasting shapes that peel cleanly (vinyl), and ultra-quick seasonal swaps (decals).
Quick Answer: For a showstopping, reusable silhouette that holds up to porch lights and weathered edges, Black foam board cutouts using a projector are recommended — expect to spend about $15–$30 per window for materials. Runner-up: removable matte vinyl sheets at roughly $10–$25 per rollpre-cut vinyl clings or cardstock printables under $10. Each option balances cost, installation time, and finish quality. ✅
Latest Spooky Halloween Projection Videos
Discover amazing Halloween projection ideas for your spooky windows!


Keep scrolling for something spooky...
To read Sally Nightmare Before Christmas: Costume and Makeup Guide

Create Your Own Halloween Projection Magic!
Transform your windows into spooky Halloween displays with professional projection equipment. Perfect for creating the same eerie atmosphere as our kawaii monster videos!
🎭 Affiliate link - Support our spooky content creation!
Deep Dive: Why these three approaches win for window silhouettes
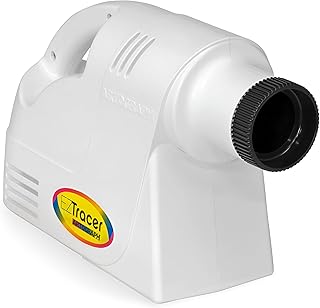
Start with why black foam board stands out: it provides depth and blocks light completely, creating sharp, high-contrast silhouettes that read clearly from the sidewalk. Foam board also resists warping better than thin paper in damp October weather. Use a projector to trace vintage or original designs onto the board; this is the fastest way to translate detailed templates into clean cuts. Many crafters rely on resources like The Graphics Fairy for vintage silhouette inspiration and printable motifs that adapt nicely to foam board.
Removable matte adhesive vinyl wins because it bridges indoor finish and outdoor durability. When cut on a hobby cutter (Cricut or similar), matte vinyl produces razor-sharp edges and a professional, printed look that resists fading for the season. For those using Cricut machines, see the Cricut blog on vinyl silhouettes for helpful workflows: Create DIY Vinyl Window Silhouettes. Vinyl peels cleanly if you choose the right adhesive (look for removable, not permanent) and works on glass without damaging blinds or frames.
Pre-cut removable decals or clings are the budget and time-saver option. They eliminate cutting time completely and are perfect when prepping many windows quickly for neighborhood displays. Clings won’t block light entirely, so they’re best for layered scenes or for windows where total blackouts aren’t possible. Sites with printables and low-cost templates like Hometalk and Capturing Wonderland provide tests of clings and printable workflows.
Price ranges: Foam board plus projector tracing materials cost vary by scale — a single window kit can be <$30 if using Dollar Tree foam boards and a budget projector; high-end projectors speed tracing in large formats. Vinyl rolls range from $10 to $40 depending on brand and finish; look for matte black or black matte permanent alternatives labeled removable. Pre-cut clings and sticker packs typically run $5–$15 each set.
Real scenarios: If a house has large front windows and the goal is midnight curb appeal, choose foam board cutouts for depth and backlit drama. If windows are rental property-facing and removal without residue is critical, pick removable matte adhesive vinyl. If the goal is quick, low-cost coverage for many small panes, go with pre-cut clings. ✨
To read Adhesive Rhinestones Halloween Decorative Applications
Buying Considerations: Check adhesive type on vinyl (removable vs permanent), foam board thickness (3/16″ to 1/4″ preferred), and whether projectors will support the required throw distance for tracing. Avoid thin poster board for outdoor-facing windows; it wrinkles in humidity and gives a soft silhouette. Keep an eye out for brands like Spooktacular Creations, Fun Express, and retail sources such as Party City for ready-made clings. 🎯
Final Recommendation: For most homeowners wanting long-term reuse and dramatic contrast, the top pick is Black Foam Board Cutouts with Projector Tracing. Purchase materials now on Amazon and start tracing — save for reference and prepare to wow trick-or-treaters. Shop templates and inspiration here. 🕸️
5 Durable Vinyl Halloween Window Silhouettes for Long-Lasting Spooky Style
Opening: Vinyl silhouettes win when durability and a crisp finish are top priorities, especially for repeated seasonal displays and rental-safe removal. This section focuses entirely on vinyl workflows and material choices for great results. 🕷️
Why choose vinyl for window silhouettes?
Removable matte vinyl creates razor-sharp edges that read clearly against interior lighting and street lamps. Matte surfaces avoid glare that reflective vinyl or sticker-paper can produce; that matte finish keeps the silhouette visible from multiple angles. Vinyl is also weather-tolerant when placed on the interior side of glass, so wind, rain, and porch fog are less of a threat. Brands and suppliers matter: look for quality backing paper and adhesive technology similar to what is used by craft suppliers and party decorators like Beistle, Amscan, and Ghoulish Productions. For cutting, hobby cutters excel: see pre-made SVG templates from the crafting community at Pinterest ideas.
Vinyl specs and use cases: Opt for 3–6 mil matte black removable vinyl for small to mid-size windows. For very large window walls, consider 6–8 mil thickness for easier removal and less curling at edges. A standard Cricut machine can handle 12 in x 24 in sheets for many windows, but floor-to-ceiling panes will demand tileable panels or a large-format cutter. If cutting by hand, use a high-quality craft knife and a printed template applied lightly to the vinyl backing.
Limitations: Vinyl can trap air bubbles and show edge lift in sun-facing windows after repeated heating cycles. Avoid extreme heat exposure; peel in cool weather when possible. Also, textured glass does not accept vinyl well; small beads, sandblasted finishes, or heavy condensation reduce adhesion.
Price and availability: Vinyl options remain widely available in 2025. Expect $10–$30 per roll depending on width and brand; many craft retailers offer seasonal discounts in September and October. Prime shipping is common for major sellers. For an eco-conscious approach, seek brands advertising water-based adhesives or recyclable backings. A useful shopping collection for related supplies includes black matte vinyl and vinyl transfer paper for layered designs.
To read Nightmare Before Christmas Party Planning Guide
Real scenarios: If the family decor style is minimalist and the house has multiple panes, choose vinyl for consistency and neatness. For community events where quick swaps are necessary, pre-cut vinyl sheets reduce setup time dramatically.
Practical example: A neighborhood decorator, named Mina, pre-cut three identical bat patterns on matte vinyl and organized them into a reusable panel system that fits three standard window panes. On chilly autumn nights, the panels are applied inside the windows and backlit by orange LED string lights for a warm halo; the matte reduces glare so the shapes remain crisp for trick-or-treaters. This approach uses brands like Stickety for removable adhesives and Brieftons LED accents for edge lighting.
Compatibility and tips: Use a squeegee and application fluid for bubble-free installs. If using a Cricut, select the correct blade and pressure settings for thicker vinyl; test with small scraps before committing to full-size cuts. For multi-pane installations, design tiles with a 1/8″ overlap and use Cricut tips for alignment techniques. Avoid permanent adhesives if there is any chance of needing to remove decals from rental property windows — removable adhesive keeps surfaces safe.
Final insight: Vinyl balances neat aesthetics with easy cleanup; invest in a quality cutter or pre-cut services for the smoothest results. Save this tip and start planning color and layering now — many sellers like Party City and online craft shops run vinyl sales in early October. 🎨
5 Step-by-Step DIY Cardboard Silhouettes: Tools, Templates, and Secrets
Opening: Cardboard and foam board silhouettes deliver bold contrast and dimensionality, perfect for backlit windows. This section provides a workshop-style walkthrough tailored to makers who want lasting in-person impact. ✂️📐
Essential tools and materials
Begin with black foam board for the strongest silhouette presence; thicker craft foam resists bending and produces a cleaner cut line. Tools include a sharp craft knife or X-Acto, a projector for tracing, electrical tape or black gaff tape for seam joins, and orange LED string lights for halo effects. Affordable material sources often include local dollar stores for basic foam board and craft retailers for specialty sheets. A concise supply list might reference the Graphics Fairy collection for printable inspirations: The Graphics Fairy silhouettes.
Step 1 — Template selection and scale: Choose a template based on window size; for large windows, tile the design into panels. When scaling, measure both glass width and visible trim, and add a 1/4″ bleed for easy taping. For vintage or ornate silhouettes, tracing from curated resources like Jenna Sue Design yields classic profiles that read well at a distance.
To read Fake Diamonds Halloween Table Decorations
Step 2 — Tracing and cutting: Project the image onto foam board and trace with a marker. If no projector is available, print tiled PDFs and transfer by carbon paper or grid-method enlargement. Cut slowly along the outline; pause on tight curves and use a fresh blade to avoid ragged edges. Save small cutouts for layered details like pumpkin teeth or witch hat buckles.
Step 3 — Assembly and reinforcement: For larger panels, join foam board seams using folded black gaff tape—this hides joins on the daylight side and maintains silhouette continuity. Reinforce edges with small strips of tape on the back to prevent sagging when the panel is mounted inside the frame.
Step 4 — Mounting and lighting: Position the silhouette inside the window, secure with removable mounting putty or tape applied to the glass edges. For a glowing border, tuck a strand of orange LED string lights behind the panel, positioned to trace the silhouette outline. For subtle layers, insert a thin vellum or parchment behind cutouts where a “moonlit” translucence is desired.
Limitations and practical fixes: Cardboard warps in high humidity, so foam board is preferred for coastal or damp climates. For long windows, consider a two-person installation to keep panels flush and aligned. If edges show daylight slippage, add thin black foam strips to the window perimeter to create a tighter blackout seal.
Real-world case: A community art group converted 12 storefront windows using foam board silhouettes backed with warm LEDs and coordinated themes across the block. They used pre-printed templates from a template collection, a small projector for scaling, and black insulation tape for near-invisible joins. The unified display improved foot traffic and earned neighborhood accolades.
Tools recap: projector, X-Acto knife, black foam board, black gaff tape, removable mounting putty, orange LEDs. Use Hometalk tutorials for visual step-throughs and variants like layered cutouts or 3D elements.
Final insight: Cardboard and foam board deliver the boldest curb appeal; invest in a good blade and projector to save time and get professional edges. Pin for later and plan templates 45–60 days ahead to avoid last-minute supply shortages. 📌
To read Fake Glass Shards Halloween Safe Props
5 Pro Tips for Installing Vinyl and Cardboard Silhouettes Safely and Removably
Opening: Proper installation preserves window finish and maximizes spooky effect. This section focuses on mounting, lighting, and removal best practices so silhouettes look sharp all season and come off without residue. 🪟🔧
Surface prep and adhesive choices
Clean glass thoroughly with an alcohol-based solution and allow to dry fully before applying vinyl or cardboard mounts. For vinyl, ensure the glass is free of silicone coatings or lotion residues which interfere with adhesion. Removable adhesives labeled “removable” provide a strong hold for the season yet peel cleanly; avoid permanent adhesive unless the silhouette is intended as a year-round decoration.
Mounting cardboard or foam board inside windows requires tape strategies that keep panels flush without marring frames. Use folded black electrical tape to hide attachment points and removable mounting putty to secure central sections. For heavy or tall panels, use two points of support at the top and a lower tab to maintain alignment.
Edge light and layering techniques: For dramatic halos, place LED rope lights or battery-operated orange string lights behind panels. Brands such as Brieftons and Gloween offer low-heat LED options ideal for proximity to paper or foam. To layer a scene (e.g., foreground tree with background moon), attach lighter vellum cutouts behind a main foam silhouette to generate depth without heavier support.
Common mistakes to avoid: Applying vinyl to textured glass, using permanent tape on painted frames, and cutting silhouettes without a scale check. Another frequent error is insufficient reinforcement for large foam panels; this leads to sagging mid-season. Measure windows precisely and test one panel before scaling the entire house.
Compatibility issues: Blinds, window tints, and film coatings affect adhesion and final look. For windows with privacy film, test a small vinyl scrap to see if it peels cleanly. If the home uses smart glass or heated windows, avoid adhesive directly on heated surfaces to prevent residue or adhesive softening.
Installation requirements: For exterior displays, keep materials inside the window unless the vinyl is rated for outdoor exposure. If affixing silhouettes outside, select UV-stable vinyl and seal edges with clear removable caulk for wind resistance. Always check local ordinances if decorating historical façades; removable mounts are often required.
Real example and tip: A cafe owner applied silhouettes nightly and removed them by morning to avoid residue on laminated glass. They used Window Flakes static clings in high-traffic doors and reserved foam silhouettes for large display windows. Over two seasons, this rotation maintained pristine glass and allowed pop-up theme swaps tied to seasonal promotions.
Final insight: Prioritize glass prep and adhesive selection; a small test run avoids big regrets. For rental-safe installs, choose removable vinyl or putty-mounted cardboard panels and document the removal process with before-and-after photos. 📸
5 Budget-Friendly Shopping and Supply Sources for Halloween Window Silhouettes
Opening: Smart sourcing keeps cost low and quality high. This section lists reliable suppliers, printable resources, and seasonal hacks to assemble silhouettes without breaking the bank. 🧾💸
Major party suppliers and brands frequently carry silhouette-ready items: Party City stocks pre-cut clings and foam kits, while Fun Express and Beistle offer packaged silhouette decorations for quick installs. For online printable templates and vintage silhouettes, resources like The Graphics Fairy and Capturing Wonderland provide high-quality downloads that are often free.
For vinyl and cutter supplies, explore craft marketplaces and manufacturer outlets. The Cricut community offers ready-to-cut SVG files and workflow guides at Cricut blog, while specialty materials like black matte vinyl and vinyl transfer paper can be purchased for layered effects. For themed props and extras, check listings like portable Halloween backdrops and Halloween candelabras to coordinate window displays with porch staging.
Discount and budget tips: Buy foam board in bulk from general office suppliers, scout clearance racks at craft chains for end-of-season vinyl, and use coupon codes during August-September sales. Free printable templates from Pinterest and community craft sites like Hometalk keep costs minimal. Dollar store foam board can work for single-season displays but step up to heavier foam for reuse.
Independent and specialty suppliers: For theatrical-grade silhouettes, seek out theatrical prop houses or special-effect vendors. For props like life-size figures or mannequin accents that complement window silhouettes, sites like life-size poseable skeletons and halloween mannequins offer statement pieces. For small accessories, brands such as Brieftons and Gloween provide lighting and accents that elevate silhouettes.
Where to get templates and inspiration: Check curated galleries like Capturing Wonderland, Jenna Sue Design, and the Graphics Fairy collection. For ready-made SVG kits, search marketplaces and specialty sellers; many kits include alignment guides and multi-pane templates to save time.
Community swap idea: Neighborhood groups can share templates and cut panels to spread cost and create a unified block theme. One block used a central template bank with printable files from a template resource, and pooled vinyl purchases to reduce per-house costs.
Final insight: Mix and match suppliers for the best value — use inexpensive foam for dramatic single-night displays, invest in quality removable vinyl for reusable decor, and rely on printable vintage motifs for authentic charm. Save this guide and shop early for best availability. 🛒🎃
Save for reference and pin this for step-by-step Halloween silhouette planning! ✨
Related inspiration and resources: inspiring silhouette ideas, shelterness window decor, and free printables at Latifano Studio. For theatrical pieces and themed props, explore neighborhood cemetery signs and costume accessories.