Show index Hide index
- 1. Nail Prep: The Foundation of Stunning Almond Nails That Last
- 2. Mastering UV/LED Lamp Use to Avoid the #1 Mistake Ruining Almond Manis
- 3. Avoid These Frequent Almond Nail Mistakes That Shrink Your Mani Life
- 4. Why Almond Nails Are a Timeless Trend—and How to Keep Yours Flawless in 2025
- 5. How to Rescue and Maintain Your Almond Nails After DIY or Salon Sessions
- Common Questions About Almond Nail Care
Your almond nails could be flawless and long-lasting—but a single overlooked error might be wrecking 90% of them! Imagine getting a perfect manicure that lasts not days, but weeks, with that enviable glossy shine that turns heads. Yet, many find their almond-shaped nails lifting, chipping, or peeling within days, wondering what went wrong. The truth: beneath the style and polish lies a critical technique that often gets missed, causing premature wear and tear. Nail enthusiasts and pros alike agree—nail preparation and curing are the unsung heroes of a durable, beautiful mani.
Here’s the deal: by mastering the right nail prepping method and understanding UV/LED curing intricacies, your almond nails will stay strong and stunning. Whether you use top brands like Sally Hansen, OPI, Essie, or prefer trendy colors from Gelish or Kiara Sky, the secret lies in how you prime and cure each layer properly. This knowledge is actionable immediately and can transform your gel or regular polish application in under an hour.
Science backs this up—for gel nails, optimal curing ensures molecules harden fully, giving strength and chip resistance. Neglect prep steps or use the wrong lamp type, and polish lifts, bubbles, or softens, regardless of cost or brand. Scroll on to skip the common pitfalls, upgrade your routine, and protect your almond nail investment.
1. Nail Prep: The Foundation of Stunning Almond Nails That Last
When aiming for almond nails that last, prep is absolutely key. The biggest mistake wrecking 90% of those dreamy manicures? Skipping or rushing prep. It might sound basic, but prepping the nail bed properly affects adhesion and durability exponentially.
Start with clean, dry hands. No cutting or wetting right before polish application—water swells the nail plate, and once dried, contraction can cause chips. Instead, push back your cuticles gently—avoid cutting unless a professional handles it—then lightly buff the nail surface using a fine buffer to dull any natural shine. This gives polish something to cling to.
Make sure to remove oils and dust by wiping nails with 70-90% isopropyl alcohol. This step cannot be overstated—it kills residue that causes polish to lift. Consider this your secret weapon for extending nail life, even with popular polish brands such as DND Daisy and Beetles Gel Polish.
To read Christmas French Tips: Classic Manicure with a Twist
Remember, polish will only adhere well on clean, dehydrated nails. Nail primer or a base coat containing primer adds another layer of assurance, especially for stubborn oils or weak nails. Enthusiasts relying on Modelones or CND products swear by this step for professional-quality wear.
Pro Tip: When prepping for almond shapes, be extra gentle around the cuticle line and nail edges to avoid lifting—these are stress points where chips commonly start.
2. Mastering UV/LED Lamp Use to Avoid the #1 Mistake Ruining Almond Manis
Now that your nails are prepped, the next decisive factor is curing your gel polish correctly. Many acrylic mani lovers and Young Nails aficionados ruin their sets by misusing their UV or LED curing lamp.
First, understand that not all lamps cure every polish. A mismatch—say, curing Essie gel polish with a standard UV lamp when the formula requires LED light—will leave your nails sticky, soft, or peeling. Always check your polish packaging or official brand websites for lamp compatibility.
Once your lamp type is sorted, time your curing precisely. LED lamps generally require 30-60 seconds, whereas traditional UV lamps need between 90-120 seconds. Under-curing leads to soft nails and early chipping; over-curing causes brittleness and an uncomfortable heat spike. To avoid this, use lamps with built-in timers or set your phone stopwatch.
Another hiccup is improper hand placement during curing. Almond nails especially benefit from flat, centered positioning inside the lamp to expose every curve and tip uniformly. Don’t rush: your thumbs may need individual curing passes for thoroughness.
The importance of “capping” nail edges during application can’t be ignored here. Dragging polish and curing along the free edge seals the tip, warding off premature chips—a hack that even pro nail techs endorse for gel and regular polish mani longevity.
To read Almond Christmas Nails: Shape-Specific Design Guide
Pro Tip: Replace your UV bulbs every 6-12 months or upgrade your LED lamp if older than two years. Weak lamps underperform, no matter your polish brand — whether that’s Gelish, Kiara Sky, or another favorite.
3. Avoid These Frequent Almond Nail Mistakes That Shrink Your Mani Life
Even with solid prep and lamp use, subtle missteps still trip up almond nail enthusiasts. Applying too thick coats, for example, spells disaster. Thick layers prevent enough light from penetrating through the polish, resulting in uncured layers prone to bubbling and peeling.
Instead, apply thin, even coats. If opacity demands it, layer several thin applications rather than one heavy one. Each layer must cure fully before the next to build resilient shine and strength.
Another often-overlooked error is shaking polish bottles. When you’re working with brands like Sally Hansen and OPI, remember: shaking introduces tiny air bubbles that sneak into your mani and ruin smooth finishes. Rolling the bottle between your palms carefully mixes the polish without bubbles.
Filing can also sabotage almond nails. Always file in one direction and use clippers for major shaping. Sawing motions cause micro-tears in the nail edge, a silent cause of future breaks. Subtle cuticle cutting is a trap, too. Buffing and hydrating with cuticle oil—applied daily—keep nails healthy and cuticles soft without risk of infection.
Finally, resist painting immediately after washing your hands or showering. Nails expand when wet and contract when dry; polish applied in this state chips rapidly. Instead, wait until nails are fully dry and consider a primer or nail strengthener to lock the perfect base.
Pro Tip: Top coat every 2-3 days to maintain your mani’s glossy finish and chip resistance. Many at-home mani pros swear by this simple habit!
To read Nails Christmas Designs: Complete Inspiration Gallery
4. Why Almond Nails Are a Timeless Trend—and How to Keep Yours Flawless in 2025
Almond nails have seen a surge in popularity, dominating Pinterest trends and nail salons worldwide. They marry elegance with a natural, elongating shape that suits many fingers, from minimalistic styles to bold color statements. But keeping almond nails flawless takes more care in 2025 than ever before, thanks to evolving polish formulas and curing technologies.
This style’s longevity depends on combining classic nail care basics with modern products like DND Daisy gel polish or Beetles Gel Polish, which offer vibrancy and durability but require correct technique. The backstory? Nail art has progressed from simple coloring to intricate layering and precise curing to maximize performance and health.
Future nail trends focus on sustainable, skin-friendly formulas along with smart curing lamps that adjust timing based on polish thickness. Investing in quality tools and learning professional prep and curing methods is the best way to future-proof your mani game.
Want more almond nail inspiration for the new school year or cozy fall looks? Check out almond back to school nails or the fall nails cozy season collections for creative ideas that keep your nails fresh and on-trend year-round.
Pro Tip: Experiment with brands like Modelones and Young Nails that offer a balance between luxury quality and wallet-friendly options. These polish ranges accommodate the subtle nuances required for almond nail care.
5. How to Rescue and Maintain Your Almond Nails After DIY or Salon Sessions
Even the best mani can lose its sheen or develop chips if aftercare is ignored. Maintaining almond nails means more than just the initial application—it’s about daily habits and smart touch-ups.
Start by applying cuticle oil at least twice daily to hydrate and strengthen. Nails can become brittle without moisture, leading to splits especially when almond-shaped nails have narrower tips. Gloves for household chores protect polish from harsh chemicals and water exposure, extending your mani’s life.
To read Thanksgiving Nail Ideas: Fresh Inspiration for Your Manicure
If polish chips or peels, don’t panic—careful repair saves the day. Lightly buff the damaged edge, remove any loose polish with a gentle remover, and reapply base and top coats precisely where needed. Brands like CND and Kiara Sky offer durable top coats perfect for on-the-fly fixes.
Regular breaks from polish also help nail health. Let your nails breathe every few weeks by skipping polish and focusing on hydration and gentle buffing. This prevents brittleness and maintains healthy growth.
Pro Tip: If your lamp is aging, replace bulbs promptly or upgrade your LED device. Keeping curing equipment optimal avoids half-cured gel layers that trap moisture and cause lifting.
Common Questions About Almond Nail Care
- Why do my almond nails keep lifting?
Most lifting results from improper nail prep or curing under an incompatible or weak UV/LED lamp. Clean, buff, and dehydrate nails before polish, and cure each thin coat fully with the correct light source. - Can I use any gel polish with my UV lamp?
No, gels differ: some require UV, LED, or dual light for proper curing. Check your polish’s instructions or use dual UV/LED lamps for versatility. - How often should I reapply top coat on almond nails?
Every 2-3 days to maintain shine and prevent chips. It’s a quick step that extends mani life significantly. - Is it safe to push back cuticles at home?
Gently yes, but cuticle cutting should be left to professionals. Buff and hydrate cuticles regularly for best results. - What’s the best way to file almond nails?
Clip to shape, then file in one direction to avoid micro-tears. This preserves nail integrity and prevents breakage.
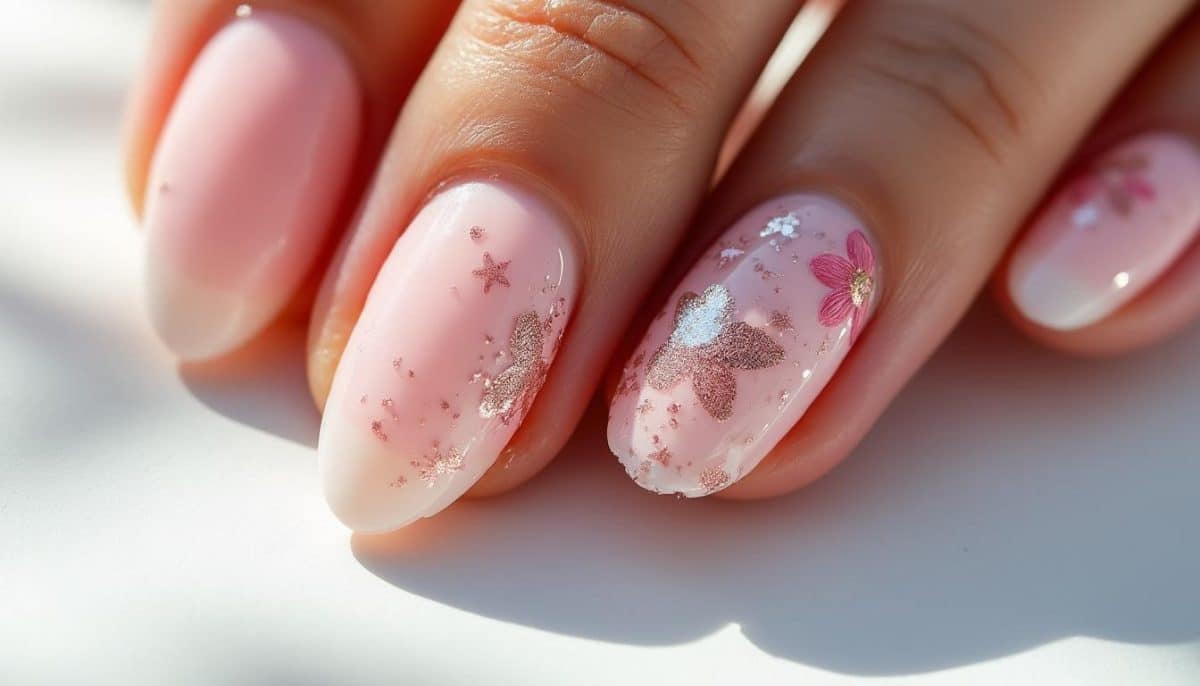
Pin for later! These expert tips will help your almond nails stay flawless and durable all year. Whether you’re a DIY lover or a salon regular, mastering prep, curing, and aftercare is your ticket to manicures that feel as good as they look.
For more on nail techniques and to avoid common pitfalls, visit this expert’s guide or explore top manicure mistakes to avoid. Learn how to trim nails properly at AAD and avoid clipping mishaps at PMC Foot and Ankle Clinic. Stay updated with the latest nail wellness advice on Prevention Beauty.