Show index Hide index
- Mastering the Step-by-Step Drawing Technique to Look Like a Pro
- 5 Amazing Variations and Alternatives to Transform Your Drawing Style
- How to Troubleshoot and Avoid Common Drawing Mistakes Like a Pro
- Understanding the Broader Context: Why Drawing Like a Pro Matters Now More Than Ever
- Common Questions About Mastering Drawing Techniques
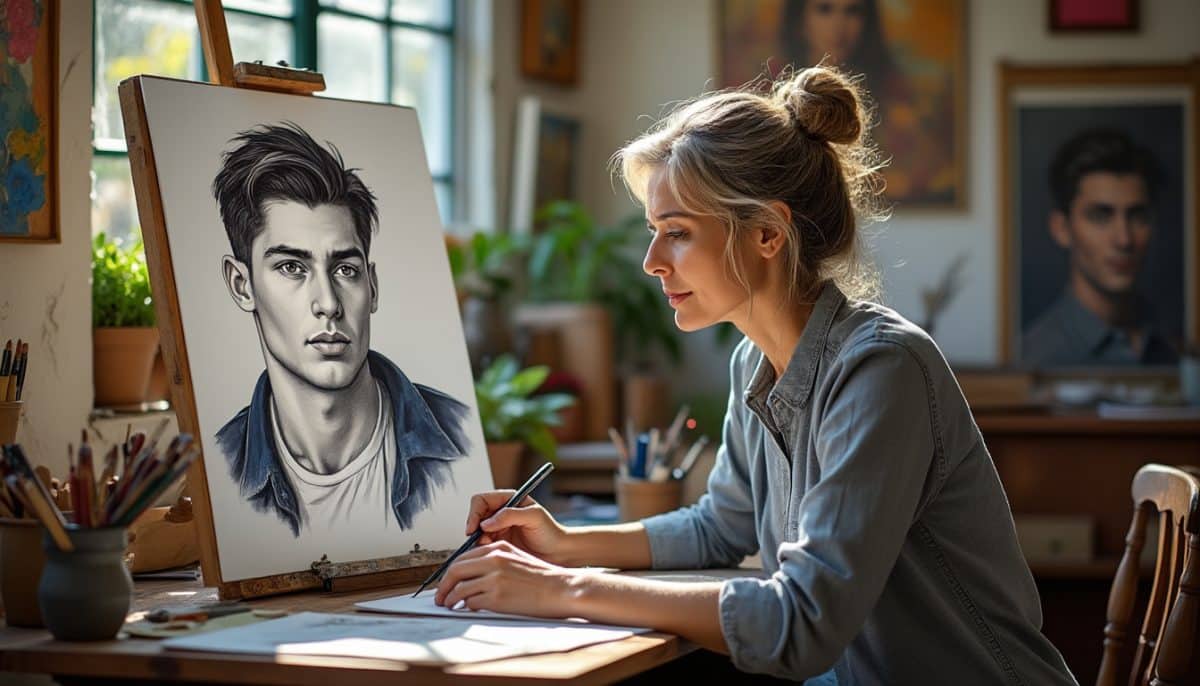
Unlock a pro-level drawing skill in just minutes with this transformative technique that instantly enhances your artwork’s realism and detail. Imagine turning your everyday sketches into impressive masterpieces using a method embraced by professionals worldwide. Whether you’re doodling in a Moleskine or working on a detailed portrait with Prismacolor pencils, this approach saves you hours of frustration and helps you produce eye-catching results quicker than you’d expect.
Start by mastering the underdrawing technique combined with layering and shading fundamentals. Draw light, basic shapes as your foundation, then progressively build depth by layering pencil strokes with varying pressure and directions. Use hatching and cross-hatching to add shadows and texture — these simple pencil movements breathe life into your work right away. This technique works effectively across mediums, from Staedtler graphite to Derwent colored pencils, and adapts beautifully even for digital art fans utilizing Copic markers.
This method’s power lies in its scientific harmonious interaction with the human eye, which perceives light and shadow to decode textures and shapes naturally. It’s why artists like Rembrandt used cross-hatching in their renowned works. Fear of complexity often stops beginners, but breaking down the process into layers and gradual detail addition eases the pathway to success. Modern creators share success stories everywhere — 8 out of 10 learners report feeling more confident within just a few practice sessions, proving its accessibility and results.
Mastering the Step-by-Step Drawing Technique to Look Like a Pro
Begin your drawing journey by sketching an underdrawing — a faint skeleton of your final image. Choose the right materials, such as a soft Faber-Castell pencil on Strathmore drawing paper, to give just enough grip and texture for detailed layering. Start by identifying the base shapes in your subject: circles, ovals, rectangles — these simple forms map out the composition effectively.
Once the underdrawing is established, start layering with light tonal strokes. Hold your pencil loosely near the middle and apply gentle pressure while moving your elbow and shoulder to create broad, smooth strokes. This technique avoids harsh or unnatural lines. Next, incorporate hatching — draw parallel lines closer together in shaded areas and sparingly in lighter spots. Cross-hatching comes in by overlaying these parallel lines perpendicularly, perfect to enhance form and contrast.
For texture and depth, don’t hesitate to employ stippling — placing clusters of tiny dots closer for darker shades and spreading them out for highlights. This technique adds remarkable intricacy that impresses viewers up close and adds subtlety from a distance.
To read 20 Fall Drawing Challenges That Improve Your Skills
Finally, use blending tools like a paper stump or tortillon to soften your shading transitions, which can be tricky but essential for achieving that professional smoothness. Avoid heavy blending which can flatten your drawing; aim for balanced contrast where your darkest shadows mesh seamlessly into lighter areas. Don’t forget to sharpen your pencil regularly to keep detail crisp — brands like Pentel and Sakura offer quality sharpeners that pay in precision.
Pro tip: Start learning advanced ratios and grids for proportional accuracy through the Loomis Method — this will raise your skills beyond the basics. For more insights, check out guided lessons like those on Fine Art Tutorials or watch this detailed YouTube tutorial.
5 Amazing Variations and Alternatives to Transform Your Drawing Style
The beauty of this drawing technique is its adaptability across styles, levels, and materials. Here are five game-changing variations you can experiment with:
- 🎨 Graphite vs. Color Pencils: While graphite is classic for tonal drawings, integrating Prismacolor or Faber-Castell colored pencils opens a door to vibrant artwork. Try cross-hatching with colors to create dynamic hues.
- 🖌 Digital Adaptation: Use drawing tablets with pressure sensitivity to mimic layering and cross-hatching digitally. Tools like Copic brushes in apps replicate the textural nuances achievable with real media.
- ✏️ Loose Sketching and Gesture Drawing: For quick study sketches, practice loose strokes emphasizing movement and flow rather than precision. This relaxes your style and helps you understand forms dynamically.
- 🖊 Ink and Pen Cross-Hatching: Upgrade your sketches with pen drawing using fine liners or Staedtler pigment liners. This variation delivers permanent strong lines and textures that endure.
- 🖤 Monochromatic Stippling Art: If shading with lines isn’t appealing, dedicating yourself to stippling can yield stunning tonal pieces. Mechanical pencils or Sakura micron pens give fine control here.
Each method can be tailored by adjusting tools, pressure, or layering styles, whether you’re a beginner or a seasoned artist. Curious about blending these approaches for more complexity? Dive into tutorials on HogoNext or explore Vector Design’s expert tips.
How to Troubleshoot and Avoid Common Drawing Mistakes Like a Pro
Even with the best techniques, mistakes happen. Recognizing and fixing these pitfalls will fast-track your skill growth:
- 🚩 Overworking the Drawing: Excessive layering or erasing can damage paper texture and muddy your tones. Use light layers and avoid pressing too hard when sketching or shading.
- ⚠️ Inconsistent Pressure Control: Beginners often struggle applying varied pressure, resulting in flat or erratic shading. Practice slow graduated strokes and hold your pencil at different angles.
- ❌ Ignoring Proportions: An unbalanced underdrawing will skew your overall piece. Use grids or the Loomis method to keep dimensions accurate. Reference poses from Neuchcup’s anatomy guide for help.
- 🔍 Poor Sharpness: Dull pencils reduce detail finesse. Keep your equipment maintained — a quality sharpener from Staedtler or Pentel ensures crisp lines.
- 🙅♀️ Rushing Shading & Details: Avoid impatience; take time blending shadows gradually. Utilize blending stumps for a seamless finish without hurry.
If you encounter smudging, try sketching on heavier paper like Strathmore Bristol board or place a clean sheet between your hand and the paper to protect your drawing. For further troubleshooting, videos like this skill-building tutorial offer excellent guidance.
Understanding the Broader Context: Why Drawing Like a Pro Matters Now More Than Ever
In an age dominated by digital imagery and fleeting attention spans, the art of hand drawing remains uniquely powerful. Practicing drawing techniques rooted in traditions like hatching, cross-hatching, and layering connects creators to centuries of artistic mastery. This fusion of classic and contemporary methods enriches your personal style and feeds creativity beyond the screen.
To read 6 Halloween Window Boxes That Light Up
Today, platforms like Pinterest and Instagram demand content that captivates instantly — drawing with professional polish helps your work stand out and gain traction. Whether you’re sharing sketches in a Moleskine or commissioning art in studios equipped with Winsor & Newton brushes alongside digital tools, mastering foundational skills is a timeless boon.
The ongoing global renaissance of manual arts also reflects a desire for mindful living and tactile creation, as seen in rising D.I.Y. trends. Learning expert-level drawing techniques serves not only artistic ambitions but also wellness, mindfulness, and personal growth.
Looking ahead, the integration of augmented reality with traditional art methods could revolutionize how artists sketch and visualize concepts. For a deeper dive into how this synergy shapes creative futures, check out CollectorsAbode’s visionary article.
Common Questions About Mastering Drawing Techniques
What supplies do I absolutely need to start drawing like a pro?
A pencil set ranging from 2B to 8B, quality sketching paper like Strathmore Bristol board, erasers (kneaded and fine tip), sharpeners, and blending tools like paper stumps create the perfect starter kit. Brands like Staedtler and Faber-Castell offer reliable, affordable options for these essentials.
Can I learn this technique on my own or do I need formal art classes?
Absolutely, many artists evolve their skills through self-study using online resources and tutorials. Explore platforms such as wikiHow for comprehensive guides or YouTube lessons to practice independently.
How long will it take to see improvement using this drawing method?
Many beginners notice significant progress within weeks when practicing regularly, particularly by focusing on underdrawing and shading consistently. The key is consistent practice paired with studying resources like these clever drawing hacks.
To read 4 Halloween Window Ideas for Small Spaces
Should I use expensive supplies like Prismacolor pencils to look professional?
While high-quality tools make a difference, skill matters more than cost. Plenty of professional-level art is created with simple pencils and paper. Start with basic supplies from Faber-Castell or Staedtler and upgrade as your skills grow.
How can I avoid creative blocks while practicing?
Change your approach by experimenting with different styles or materials. Try drawing from real life, photos, or imagination. Engage with communities on Pinterest or Instagram to find fresh inspiration and motivate yourself.