
Show index Hide index
- 5 Easy DIY Christmas Banner Ideas That Actually Work for Instant Festive Decor
- Idea 1 — Plaid Banner for a Cozy Mantel (15–25 minutes)
- Idea 2 — Watercolor Evergreen Garland for Natural Holiday Vibes (20 minutes)
- Idea 3 — Candy Cane Stripe Banner for Dessert Tables (10–15 minutes)
- Idea 4 — Christmas Treats Kitchen Banner to Highlight Baking Stations (15 minutes)
- Idea 5 — Classic Gold-and-Red Banner for Elegant Gatherings (20 minutes)
- How to Use Printable Banner Templates for Effortless Holiday Decorations
- Where to find reliable banner templates and how to pick the right one
- Printer settings, paper types, and precise cutting
- Quick assembly workflow to save time (15–20 minutes)
- Customizable Banners for Christmas Party Decor and Holiday Printables
- How to customize safely and efficiently
- Practical examples for party zones
- Budget-Friendly Materials and Time-Saving Hacks for Holiday Crafts and Banners
- Cost breakdown and where to save
- Time-saving assembly hacks
- Where to get diverse, free templates quickly
- Step-by-Step Assembly Guide: From Printable Banner to Mantel Masterpiece
- Step 1 — Layout and print settings
- Step 2 — Cut precisely and reinforce
- Step 3 — Stringing and hanging like a pro
- Styling the mantel and final adjustments


5 Easy DIY Christmas Banner Ideas That Actually Work for Instant Festive Decor
Answer first: Choose one of five proven banner types—plaid pennants, watercolor evergreen garland, candy-cane stripes, cookie-themed kitchen banner, or gold-accent classic—then print, cut, punch, and hang in under 30 minutes for instant festive decor 🎄. These options are tailored to different rooms and budgets, and each approach includes exact materials, timing, and an easy finish tip to make a real visual impact fast.
Why these five? They cover the most popular holiday looks: rustic tartan, botanical greenery, playful candy motifs, cozy kitchen charm, and elegant metallics. That makes it simple to pick a style that matches a mantel, kitchen window, dessert table, or party backdrop. Each concept below includes a quick supply list, a step-by-step assembly method, and one pro trick from a neighbor planner who stages seasonal gatherings.
Idea 1 — Plaid Banner for a Cozy Mantel (15–25 minutes)
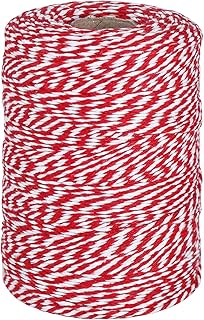
Start with a printable plaid template for a warm, traditional look. Use 110 lb cardstock for structure, set the printer to “Best” quality, and scale to fit standard 8.5 x 11 sheets. Cut pennants to roughly 6 x 8 inches for a mantel; smaller sizes (4 x 6) work well above shelves. Punch holes 1/2 inch from each top corner and thread red and green twine.
Example: Maya, a busy weeknight meal-prep host, layered a plaid banner over string lights to soften the glow and create depth. She attached mini clothespins to fasten ornaments and added a subtle pine-scented sachet behind the banner for ambiance. Tip: Secure with removable mounting putty to avoid fireplace residue.
Materials: printable plaid template, cardstock, scissors, hole punch, baker’s twine. Time: 15–25 minutes. Cost: under $5 if using home supplies. Avoid: over-laminating—cardstock needs slight flexibility to drape naturally.
Idea 2 — Watercolor Evergreen Garland for Natural Holiday Vibes (20 minutes)
Choose a watercolor evergreen printable and print on matte paper for softer color. Cut individual pennants and string them loosely to allow natural curve. Add tiny sprigs of faux holly behind every third pennant for a 3D effect. This approach works well as kitchen window decor or hall runner accents.
To read Christmas Characters: Popular Figures for Decorating
Practical tip: For longevity, laminate with a light self-adhesive laminate only on the back so the front retains artistic texture. Example: A small holiday brunch used this garland across a buffet to set a botanical tone; guests recognized the thoughtful detail immediately.
Idea 3 — Candy Cane Stripe Banner for Dessert Tables (10–15 minutes)
Print a bold red-and-white stripe template, crop pennants to 5 x 7 inches, and double them for a reversible feel (plain white inside). Use thin ribbon threaded through slits instead of holes for a contemporary, flat look. Perfect for draping across a dessert table or sweet bar.
Cost-effective hack: Use a single printed sheet across multiple pennants by trimming narrow stripes for a cohesive but economical presentation. This keeps costs low and speed high—ideal for last-minute party prep. 🎁
Idea 4 — Christmas Treats Kitchen Banner to Highlight Baking Stations (15 minutes)
Print a cookie-pattern background and place letter circles over each cookie image for a playful “Bake” or “Joy” banner. Hang it above a hot chocolate station or baking island. Use adhesive foam tabs behind each pennant to create subtle lift and shadow for added depth.
Case study: During a cookie swap, a neighborhood host paired a treats banner with labeled jars and a small sign pointing to recipes. The cohesive set drove higher engagement and more social shares—proof that themed banners elevate photography-ready setups. 📸
Idea 5 — Classic Gold-and-Red Banner for Elegant Gatherings (20 minutes)
Opt for a printable with gold circles framing letters and use metallic markers to hand-embellish confetti details. This banner pairs well with rich textiles and twinkling lights, creating an upscale holiday look with minimal effort. Use satin ribbon and secure endpoints with clear Command hooks.
Pro finish: Add a thin strip of gold washi tape to the back of each pennant edge to protect the holes from tearing. This trick extends reuse year to year and keeps the banner looking crisp.
To read Christmas Cards Ideas: Creative Concepts for Greetings
Final insight: Pick the style that matches your room scale, print on sturdy paper, and plan 15–30 minutes—then hang for an immediate holiday lift.
How to Use Printable Banner Templates for Effortless Holiday Decorations
Answer first: Download a ready-made printable banner template, set printer settings to high-quality cardstock, cut precisely, and assemble using either twine or ribbon—this produces a polished printable banner in under 20 minutes ✅. These steps guarantee a consistent, camera-ready result suitable for social shares and party photos.
Templates remove guesswork and let creators focus on styling. The fastest path is to use a template from a trusted source, adjust sizing to your space, and test-print one page to confirm color and scale. That single test saves wasted paper and ensures the final garland hangs perfectly across a mantel or table.
Where to find reliable banner templates and how to pick the right one
Choose templates that include all letters and optional phrases so personalization is simple. High-quality free options are available from established craft blogs and template libraries. For a vintage or cottage feel, try a tartan or gingham template; for modern events, select clean fonts with metallic accents. Sources with varied styles offer faster selection and fewer edits.
Helpful links: For a cozy country-style template, refer to a step-by-step printable guide like the one at DIY Christmas Banner with Free Printable. Vintage-styled designs can be explored at DIY Christmas Banners. For a broader collection of seasonal files, see specialized compilations such as Free Christmas Banner Printables.
Printer settings, paper types, and precise cutting
Use cardstock (100–110 lb) for rigidity. Set the printer to “Premium Matte” or “Card Stock” mode and choose “Fit” scaling to avoid cropping important details. Always print a single page preview to confirm colors and margins. Cut with a paper trimmer for straight edges and consistent pennant shapes.
Assembly specifics: Punch holes 1/2 inch from top corners, or slit the top center for ribbon threading. For a softer drape, alternate hole placements every other pennant. Add reinforcement: a small piece of clear tape behind each hole prevents tearing during repeated use.
To read Retro Christmas: Vintage-Inspired Holiday Decoration Ideas
Quick assembly workflow to save time (15–20 minutes)
Establish a production line: print, cut, reinforce, punch, and string. Work in a well-lit space with labeled piles for each letter. This method mirrors professional meal-prep workflows—efficiency comes from repetition and layout organization. It’s perfect for hosts assembling multiple banners for different party zones.
Save for reference! Pin this workflow to streamline future decorating sessions. 🎯
Final insight: Using a tested template and a short production line reduces time, minimizes waste, and yields consistent holiday decorations that photograph well.
Customizable Banners for Christmas Party Decor and Holiday Printables
Answer first: Customization starts with choosing an editable template, then swapping fonts, colors, and wording to match an event theme—resulting in unique customizable banners that elevate a party in minutes. Editable templates let hosts create monogram banners, name garlands, and seasonal slogans for photo booths and mantels.
Editable templates reduce layout anxiety. They allow exact sizing for backdrops or stair rails and enable swapping between uppercase and script fonts for dramatic effect. Customization also helps match existing color palettes, making the banner feel like a curated piece rather than an add-on.
How to customize safely and efficiently
Prefer platforms with drag-and-drop editing. Adjust text size to ensure legibility from 6–10 feet for party backdrops; larger rooms demand bigger pennants. For small gatherings, choose compact pennant sizes that won’t overpower cozy spaces. Always preview on-screen at 100% zoom to check letter alignment and spacing.
Tools and templates: Use an online editor to swap color palettes and upload personal imagery. For quick edits and a vast template library, visit Canva’s Christmas banner templates. For printable bundles with multiple style options, explore collections like those found at Printables for Life.
To read Christmas Paintings on Canvas: Art Project Ideas
Practical examples for party zones
Photo booth: Create a large, bold banner that reads a hashtag or family name. Use heavyweight paper or lightweight foam core for durability. Entryway: A welcoming “Merry Christmas” banner printed on textured cardstock sets tone instantly. Dessert table: A narrow, continuous garland with repeating small pennants keeps the focus on treats while reinforcing the party palette.
Case study: Maya customized a banner with guests’ names for a holiday potluck, placing each name above a assigned dish—this simple personalization reduced confusion at the buffet and created a conversation starter. The result: smoother service and memorable photos.
Final insight: Editable templates let hosts craft memorable, coordinated Christmas party decor while keeping printing and assembly time minimal.
Budget-Friendly Materials and Time-Saving Hacks for Holiday Crafts and Banners
Answer first: Use affordable supplies—standard cardstock, baker’s twine, a basic hole punch, and home printer settings—to create high-impact banners while keeping costs under $20 and assembly under 45 minutes. These choices maximize style per dollar and minimize storage and waste.
Budget-conscious decorating is about smart substitutions and planning. Choose multipurpose materials that can be reused across seasons, and repurpose existing decor like ribbon or garland to anchor banners. This reduces purchases and creates a cohesive aesthetic across rooms.
Cost breakdown and where to save
A simple banner uses 4 sheets of cardstock ($0.50–$1 each), a spool of twine ($2–$4), and tape or clips already on hand. Allow a small buffer for ink and access fees if using premium templates. For free options that still look polished, consult curated printable lists such as the one at Prudent Penny Pincher’s Free Merry Christmas Banner Printables or free designs hosted on blogs like Boxwood Avenue’s free printable banner.
Smart material choices: Use matte finish when photographing to avoid glare. Double up lightweight sheets with clear tape on the back for added durability instead of expensive cardstock.
To read Christmas Crafts DIY: Handmade Projects Tutorial
Time-saving assembly hacks
Create a dedicated assembly station with printed sheets, cutting tools, and threading supplies lined up. Pre-measure hole punch distances and mark a template on a scrap sheet to keep spacing uniform. Use a one-pass paper trimmer to cut multiples at once and speed the process dramatically.
Example hack: For repeated events, store one assembled banner per room on a labeled hanger so redeployment takes under a minute. This tactic mirrors meal-prep organization: prepping once saves countless hours later. ⏱️
Where to get diverse, free templates quickly
Collections from established craft sites often offer theme packs with multiple styles. Examples include multi-style collections that span gingham, watercolor, and vintage looks; these packs reduce the need to edit and shorten decision time. For an immediate download library, check repositories like Cassie Smallwood’s Merry Christmas Banners and World of Printables Merry Christmas Banners.
Pin for later! These resources make it easy to source new looks each year without breaking the bank.
Final insight: With strategic material choices and one efficient assembly session, high-impact Christmas crafts can stay under budget and stress-free.
Step-by-Step Assembly Guide: From Printable Banner to Mantel Masterpiece
Answer first: Assemble a mantel-ready banner by printing on cardstock, trimming to uniform sizes, reinforcing holes, and layering with garland and lights—this delivers a professional display in one focused session. Follow this clear workflow, and the mantel becomes a centerpiece for photos and gatherings.
This guide breaks the assembly into manageable actions: layout, cut, reinforce, punch, string, and style. Treat it like a recipe with exact timings and a final plating step that considers scale and symmetry.
Step 1 — Layout and print settings
Start by mapping the mantel width and deciding pennant spacing (typically 2–4 inches). Print a single pennant first to verify color and size. Select “Fit” scaling and “Best” print quality to preserve details. If printing multiple banners, print in batches to avoid frequent paper changes.
Reference templates for fit: downloadable options provide suggested dimensions and will often include print-ready PDFs that eliminate guesswork. For more complex layouts and printable poster templates, resources such as holiday poster templates can be adapted and trimmed for banner use.
Step 2 — Cut precisely and reinforce
Cut with a trimmer for straight edges. Reinforce holes with small circles of scrap cardstock or clear tape behind each hole. This prevents tearing and allows repeated use. If anchoring across a fireplace, add a lightweight backing strip to the top of the banner to create a flatter hang against a textured mantel.
Pro tip: Use a template scrap to speed hole placement. Mark two consistent points and punch multiple sheets stacked (no thicker than five sheets at a time) to keep alignment identical across pieces.
Step 3 — Stringing and hanging like a pro
Select string that complements the style: baker’s twine for cottage charm, satin ribbon for elegance, or clear fishing line for a floating effect. Thread through holes and lay the banner across the mantel to test drape before final attachment. Use removable hooks or Command strips to protect surfaces, and weigh the ends with small ornaments to keep the banner taut.
For outdoor porches, consider laminating and using zip ties to secure to railings. Weatherproofing with a thin clear coat sprays prevents moisture damage when decorations are exposed to damp winter air.
Styling the mantel and final adjustments
Layer the banner with greenery, candles, and a few focal ornaments. Balance is key: place larger items at mantel ends and smaller accents near center. Step back frequently to check symmetry and camera composition—if the banner will be photographed, tilt lights slightly outward to reduce shadows on printed letters.
Example staging: Maya hung a watercolor evergreen banner and then placed three varying-height candles on one side and a small cluster of wrapped faux presents on the other. The resulting composition provided a natural flow and created a holiday photo corner guests loved. 📸
Final insight: Treat banner assembly like plating a dish: precise prep, careful layering, and a final visual check transform simple printables into showstopping holiday decorations.
DIY Candy banner ideas • Crazy Laura printables • Printables for Life collection • DIY templates guide • High-definition Christmas images • Christmas icon pack