Show index Hide index
- 5 Easy DIY Christmas Ornaments for Quick Homemade Decorations 🎄✨
- 1) Clear ball glitter fill — 15 minutes, budget-friendly
- 2) Cinnamon dough ornaments — 45 minutes including bake time
- 3) Woven paper stars — 30–60 minutes, family-friendly
- 4) Clove-studded oranges — 1 hour (plus drying)
- 5) Painted wood slice initials — 30 minutes each
- 7 Clever Paper and Origami Christmas Ornaments for Handmade Charm ✂️🎁
- Origami stars and woven paper ornaments
- Round paper baubles & geodesic paper baubles
- Printable snowflakes and paper lanterns
- Practical adaptations and supply counts
- 3 Advanced Mixed-Media Ornament Projects for Lasting Impact 🛠️🌟
- Chinoiserie painted ornaments — time 90–120 minutes
- Copper leaf and gilding with texture — 60–90 minutes plus drying
- Wood-burned and vinyl detailed wood slices — 45–75 minutes
- Decorating Strategy: Assemble a Maker’s Workflow for Christmas Crafting 🧰🎨
- Supply sourcing and budgeting
- Batch crafting and time management
- Storage, labeling, and longevity
- 10 Gift-Ready Ornament Ideas and Presentation Tips for Handmade Giving 🎁❤️
- Custom themed bundles and personalization
- Presentation materials and step-by-step staging
- Timing and shipping considerations


5 Easy DIY Christmas Ornaments for Quick Homemade Decorations 🎄✨
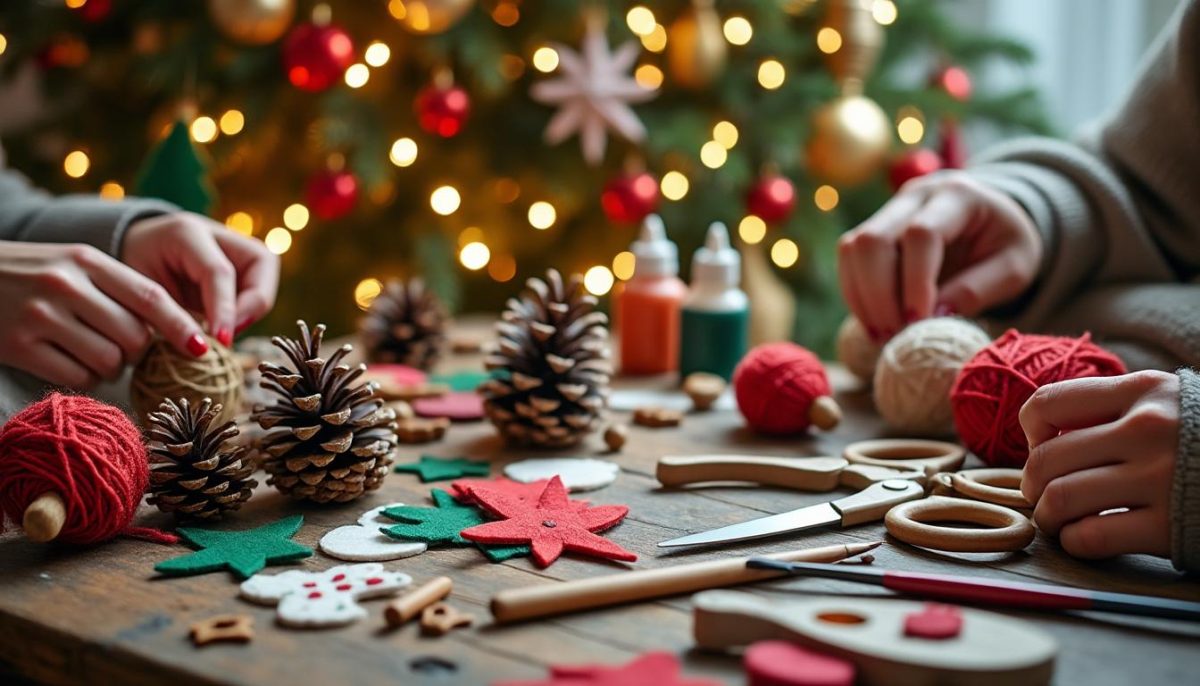
Make beautiful Christmas ornaments fast: start with one simple project that transforms ordinary craft supplies into show-stopping tree accents in under 30 minutes. This section delivers five practical ornament techniques—each explained with exact supplies, time estimates, and a single pro tip to keep the process streamlined.
Why choose these projects first? They require minimal tools, low cost, and high visual impact. The Harper family chose these as weekend warm-up crafts and finished a dozen ornaments in an afternoon.
1) Clear ball glitter fill — 15 minutes, budget-friendly
Conclusion first: fill clear plastic or glass balls with glitter and felt to make instant festive decorations. Use one clear ornament, 1 tablespoon of glitter, a pinch of faux snow, and a narrow funnel. Shake and secure with hot glue, then tie with baker’s twine. This yields a reflective, sparkly sphere that catches tree lights.
Supporting details: cost per ornament under $2 if purchasing glitter and plastic balls in bulk. Avoid clumping by shaking the ornament upside-down while the glue sets. The Harper kids loved adding tiny pom-poms for texture. Pro tip: add a drop of glycerin to keep glitter suspended longer for a slow-fall effect.
2) Cinnamon dough ornaments — 45 minutes including bake time
Conclusion first: create aromatic, rustic homemade decorations using a simple dough of 1 cup applesauce and 2 cups ground cinnamon. Roll to 1/4″ thickness, cut shapes, stamp a name, and bake at 175°C (350°F) for 45 minutes. The result is a durable, scented ornament.
Supporting details: these double as gifts—wrap with a ribbon and a kraft tag. Common mistake: over-baking makes them brittle; check after 30 minutes. The Harper family used a star cookie cutter and tied them with red gingham ribbon for a vintage look.
To read Christmas Characters: Popular Figures for Decorating
3) Woven paper stars — 30–60 minutes, family-friendly
Conclusion first: weaving paper strips makes ornate-looking handmade ornaments that are inexpensive and child-friendly. Cut card stock into 1″ strips, weave into a star core, and glue the tips. Finish with metallic ink on edges.
Supporting details: origami stars are more intricate but woven paper stars look complex without advanced folding skills. Resources for templates and step photos are available through a comprehensive homemade Christmas ornaments guide. The Harper teens enjoyed swapping patterned scrapbook paper to create matching color palettes for a themed tree.
4) Clove-studded oranges — 1 hour (plus drying)
Conclusion first: make sensory-rich holiday crafts by pressing whole cloves into halved oranges. Dry for several days to form a long-lasting, fragrant ornament. Use ribbon loops anchored with toothpicks for hanging.
Supporting details: these are décor and potpourri in one. Avoid mold by drying slowly at room temperature, turning daily. The Harper kitchen smelled like a cottage bakery—this project doubles as hospitality when making garlands or gift toppers.
5) Painted wood slice initials — 30 minutes each
Conclusion first: personalise wood slices with monogram letters for heirloom-quality handmade ornaments. Sand the slice, paint the background with acrylic, add a scripted initial in white, seal with Mod Podge, and tie with twine.
Supporting details: wood slice ornaments pair well with a farmhouse or rustic tree. Use a wood-burning tool for longer-lasting lettering. The Harper family created a countdown set by dating slices with years for a keepsake collection.
Save supply lists and step images in one place and Pin for later! 🎁
To read Christmas Cards Ideas: Creative Concepts for Greetings
Key insight: starting with five quick wins makes larger DIY projects feel achievable and builds momentum for more advanced Christmas crafting.
7 Clever Paper and Origami Christmas Ornaments for Handmade Charm ✂️🎁
Answer first: paper-based Christmas ornaments deliver maximum style with minimal expense—ideal for bulk decorating and kid-friendly sessions. This section explains seven adaptable paper techniques with stepwise how-to and exact material counts.
Why paper works: paper is lightweight, customizable, recyclable, and perfect for intricate shapes that look expensive on the tree. The Harper family used paper ornaments to make a coordinating mantel display that stayed intact year after year.
Origami stars and woven paper ornaments
Conclusion first: fold or weave paper into star forms to create delicate, ornate shapes that read high-end. Origami stars require patience; woven stars are forgiving and repeatable. For origami, start with 6 cm square paper; for woven stars, use 1″ strips of 12 cm length.
Supporting details: the technique choice depends on skill and time. Origami yields crisp geometry perfect for minimalist trees. Woven stars offer a folk aesthetic ideal for a cozy, traditional look. Explore visual step guides via creative DIY ornament tutorials for templates and photo walkthroughs.
Round paper baubles & geodesic paper baubles
Conclusion first: spherical paper baubles combine simple cutting with clever joining seams to produce elegant globes. A geodesic approach uses triangular units that slot together into a 3D dome—use 12–20 pieces depending on size.
Supporting details: round paper lantern templates adapt to color themes; geodesic baubles reward precise scoring for a polished result. The Harper family color-coded baubles for a gradient effect that created visual unity across windows and tree branches.
To read Retro Christmas: Vintage-Inspired Holiday Decoration Ideas
Printable snowflakes and paper lanterns
Conclusion first: printable snowflake templates let anyone create intricate snowflakes in minutes. Paper lantern templates adapt to multiple holidays and fold flat for storage. Print templates on 120gsm card for durability.
Supporting details: cutting technique matters—use a precision blade and a cutting mat. For lanterns, reinforce with a double layer at the hang point to avoid tearing. Many free printables and templates appear on resource compilations like the BHG easy Christmas ornaments page.
Practical adaptations and supply counts
Conclusion first: plan materials by counting ornaments needed before crafting—estimate one bauble per 0.5 linear meter of tree height. For a 6-foot tree, budget ~60 lightweight paper ornaments for balanced coverage.
Supporting details: bulk craft supplies—card stock, glue sticks, metallic pens, and clear thread—keep the process efficient. The Harper family bought a cutter set and a bundle of patterned paper to save time. Avoid common mistakes by pre-folding and labeling paper units in batches.
Key insight: paper ornaments scale beautifully for parties and gifts—their low cost and versatile aesthetics make them a staple for purposeful Christmas crafting. 🎨
3 Advanced Mixed-Media Ornament Projects for Lasting Impact 🛠️🌟
Direct answer: mixed-media ornaments—combining wood, glass, metal leaf, and fabric—create heirloom-quality pieces that stand out among store-bought baubles. This section covers three advanced projects with material lists, step sequencing, and finishing techniques.
Why these projects matter: they create keepsakes and gifts with tactile complexity. The Harper family selected one mixed-media piece each year, tracking the collection in a decorative box that became a cherished tradition.
To read Handmade Christmas Gifts: Personal Presents They’ll Cherish
Chinoiserie painted ornaments — time 90–120 minutes
Conclusion first: painting delicate blue floral patterns on white glass creates timeless ornaments inspired by chinoiserie. Use a fine sable brush, ceramic paint or enamel, and a stable hand. Begin with a base coat, sketch a light motif, then fill with layered strokes.
Supporting details: seal with clear spray for longevity. This technique needs practice; start on practice bulbs before committing to glass. For step-by-step visual cues, consult curated collections like Martha Stewart ornament projects for refined examples. The Harper family taught their eldest to steady the wrist by bracing the elbow on the table edge.
Copper leaf and gilding with texture — 60–90 minutes plus drying
Conclusion first: applying copper leaf to a glass or plastic ornament introduces metallic warmth and depth. Apply adhesive size, press leaf sheets gently, then burnish and seal. Add painted details and tiny pearls for contrast.
Supporting details: work in a draft-free area to prevent leaf tearing. Use cotton gloves to avoid oils transferring. A quick experiment by the Harper family layered copper leaf over a painted matte base for a luxe patina that photographs beautifully for social shares.
Wood-burned and vinyl detailed wood slices — 45–75 minutes
Conclusion first: wood-burning tools create rustic graphics and typography on slices; combining with vinyl transfers yields crisp lettering. Sketch a template, burn lines slowly, then add white paint highlights or gold leaf accents.
Supporting details: safety first—use gloves and ventilation. The Harper family used a silhouette machine for repeatable vinyl stencils, producing a cohesive set of name-tag ornaments for gift-giving.
Key insight: advanced mixed-media ornaments reward planning and offer the tactile variety that turns homemade decorations into cherished heirlooms. 🏺
To read Christmas Paintings on Canvas: Art Project Ideas
Decorating Strategy: Assemble a Maker’s Workflow for Christmas Crafting 🧰🎨
Start with the outcome: design a coherent color scheme and production schedule 45–60 days before decoration day to avoid last-minute stress. This section gives an organized workflow—supply sourcing, batch crafting method, storage, and display strategies that the Harper family used to scale from a single DIY tree to an entire home décor plan.
Why organization matters: a clear plan saves money and time, and ensures every ornament contributes to an intentional theme. The Harper family tracked projects in a simple spreadsheet to assign tasks, materials, and dry times.
Supply sourcing and budgeting
Conclusion first: buy core craft supplies in bulk and special items as needed. Purchase clear ornaments, wood slices, glue gun sticks, ribbon, and a mixed media kit early to capture seasonal discounts. For inspiration and shopping lists, check roundups like Pioneer Woman ornament picks and a broader collection at Leap of Faith crafting projects.
Supporting details: estimate costs—paper projects average $0.50–$2 each, mixed-media $5–$12. Plan for extras: glue guns and paint brushes last multiple seasons. The Harper family budgeted $40 for initial supplies and recouped value by gifting sets.
Batch crafting and time management
Conclusion first: group identical steps across ornaments to save time—cut all paper pieces first, then glue, then decorate. Use an assembly-line approach: one person preps materials while another paints or sews. This reduces context switching and preserves creative energy.
Supporting details: time blocks of 45–90 minutes are ideal. For large runs, schedule two sessions separated by drying time. The Harper family hosted a Saturday crafting party that produced 40 ornaments; everyone left with a themed set and a feeling of accomplishment.
Storage, labeling, and longevity
Conclusion first: store ornaments flat or in compartmented boxes with acid-free tissue to preserve colors. Label boxes by year and room destination. For fragile glass, bubble-wrap each item and keep with silica packets to avoid moisture damage.
Supporting details: label with a simple tag—project name, date, and a note on materials used for future reference. The Harper family kept a small journal of techniques and tweaks, turning each subsequent season into a refinement rather than a redo.
Key insight: the right workflow converts craft enthusiasm into a repeatable tradition—yielding beautiful results, less stress, and more time to enjoy the season. 🎅
10 Gift-Ready Ornament Ideas and Presentation Tips for Handmade Giving 🎁❤️
Main point first: turn ornaments into meaningful gifts with simple presentation upgrades—gift boxes, custom tags, and bundled themes. This section outlines ten thoughtful ornament gift concepts, exact wrapping supplies, and timing so handcrafted ornaments arrive as polished presents.
Why presentation raises value: a well-presented ornament reads as intentional and premium. The Harper family used inexpensive kraft boxes and printed tags to make each handmade piece feel special.
Custom themed bundles and personalization
Conclusion first: bundle three ornaments in a small box tied with twine and a printed label that explains the materials and care instructions. Personalize with a year and initials for a keepsake effect. This small step upgrades the perceived value significantly.
Supporting details: create themes—”Woodland”, “Sparkle”, “Retro”, or “Kid’s Movie”—and match color palettes and textures. The Harper family paired wood-burned ornaments with evergreen sprigs in each box for a cozy aroma and presentation.
Presentation materials and step-by-step staging
Conclusion first: use kraft boxes, shredded tissue, a hand-stamped tag, and a ribbon loop to secure the ornament. Add a small card with a production note—materials used and year made—and an instruction line for display care.
Supporting details: invest in 100 printable tags ($10) and a roll of kraft ribbon for consistent branding. For photos to accompany digital gifting, photograph each ornament on neutral fabric with soft daylight to enhance online presentation. For how-to inspiration and creative packaging examples, browse curated lists like RD’s DIY Christmas ornaments list and practical ideas at Country Living ornament crafts.
Timing and shipping considerations
Conclusion first: craft gifts 2–3 weeks before shipping to allow for full curing and careful packing. Use foam inserts for fragile pieces and choose tracked shipping for peace of mind. The Harper family labeled fragile boxes clearly and scheduled a final craft night two weeks before holidays to finalize packaging.
Supporting details: for international recipients, avoid fresh-scented items that may be flagged and always include a care note. Craft markets and local holiday fairs are ideal for selling or gifting—see curated event lists at Christmas crafts holiday markets for local inspiration.
Key insight: intentional presentation multiplies the emotional impact of homemade decorations, turning simple ornaments into cherished gifts and memorable tokens. 🎀
Extra resources: for more ideas and tutorials, explore HGTV easy handmade ornaments, and for tree-decor inspiration, see Christmas tree decoration ideas. For quick seasonal craft jumps, check easy Christmas crafts and homemade gift bundling tips at homemade Christmas gifts inspiration.