Show index Hide index
- 1. Quick Cozy Christmas Paintings on Canvas to Start Today — simple projects that actually work
- Supplies, setup, and time estimates
- Examples and step-by-step actions
- 2. Festive DIY Canvas Scenes: Trees, Cabins, and Snowy Forests that feel professional
- Color mixing and layering techniques
- Compositional tricks and time-saving shortcuts
- 3. Giftable Holiday Canvas Art: Mini canvases and budget-friendly projects that delight
- Project ideas that photograph and gift beautifully
- 4. Mixed Media & Texture Techniques for Christmas Canvas Art — add sparkle and depth
- Safe material choices and sealing strategies
- 5. Plan a Christmas Canvas Art Party and Seasonal Decor Strategy that actually works
- Host flow and roles


Christmas paintings on canvas deliver instant holiday cheer 🎄. These carefully chosen tools at the top of the page set the tone for immediate action: grab an acrylic paint set, a reliable brush kit, and a stack of mini canvases to start one or five quick DIY festive projects today. Save this page and Pin for later! ✨
1. Quick Cozy Christmas Paintings on Canvas to Start Today — simple projects that actually work
Begin with one clear, achievable result: create a display-ready piece in 20–60 minutes. That immediate outcome is the most important step for beginners who want fast satisfaction. 🎨
Choose a small canvas (5×7″ or 4×4″) and focus on a single motif: a glowing Christmas tree, a candy cane, or a red ornament. A compact supply list keeps decisions simple: 1 small canvas, 4–6 paint colors (cadmium red, sap green, titanium white, ultramarine blue, yellow ochre), a size 6 round brush, and a liner brush for detail. Cost estimate: under $20 per painting if supplies are bought in basic kits. This budget approach is practical for gift-making and group crafts.
Supplies, setup, and time estimates
Start with workspace setup: a small tray for water, a paper towel, and a palette. Prep time: 5 minutes. Painting time: 15–45 minutes depending on detail. Drying time: acrylics typically dry to touch within 15–30 minutes, making layering fast and forgiving. 🎁
Technique first: block in large shapes, then add highlights. For a simple Christmas tree, paint a triangular green silhouette, add quick ornament dots in red and gold, and finish with small white taps for snow. That method yields a high-impact result without complicated blending.
Examples and step-by-step actions
The candy cane motif: sketch the cane lightly, wet the stroke area with a damp brush, then lay in alternating stripes of alizarin crimson and white. Add a bow in a contrasting hue to increase perceived complexity. This single-step layering gives a professional look in under 20 minutes.
To read Christmas Cards Ideas: Creative Concepts for Greetings
The teal ornament approach: wet the circular area, drop in turquoise mixed with ultramarine, then lift a small highlight with a clean damp brush for glassy shine. A metallic gel or gold pen completes the ornament. That highlight rule is the highest-return detail for any ornament study.
Common mistakes to avoid: overworking wet acrylics causes muddiness; placing tiny details before larger values are established wastes time. Work from broad shapes to fine details to stay efficient and confident.
For inspiration and additional easy patterns, browse curated collections of Christmas painting ideas and step-by-step beginner projects on holiday paint and sip inspiration. These resources align with quick-start techniques and offer downloadable reference visuals.
Olivia, a fictional craft-night host introduced as the thread for this guide, uses two trays of paint and a timer to keep guests on track during winter gatherings. Her method: set a 20-minute “color-blocking” session, followed by a relaxed 15-minute detail round. That structure converts hobbyists into confident makers.
Key insight: start small, focus on one motif per canvas, and use a timed two-phase approach to produce beautiful, frame-ready Christmas paintings in under an hour. 🎨✨
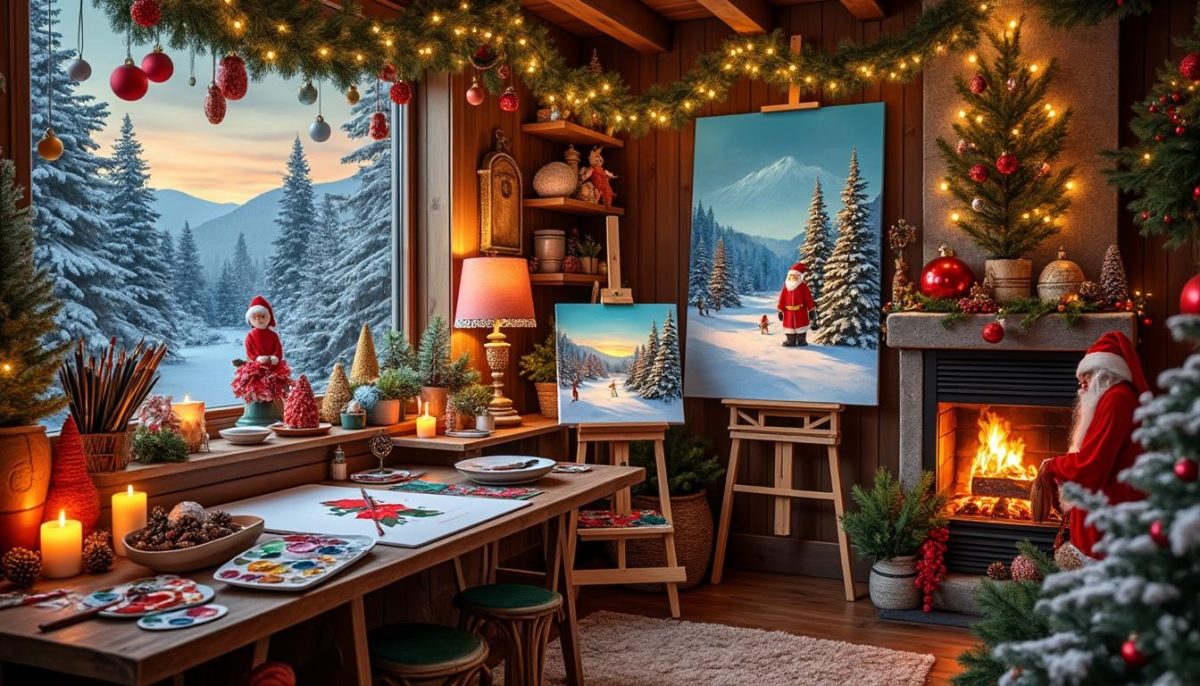
2. Festive DIY Canvas Scenes: Trees, Cabins, and Snowy Forests that feel professional
Decide the mood first: peaceful, rustic, or modern — then build composition around that decision. That upfront clarity makes larger canvases manageable and results consistent. 🌲
Large scenes (12×16″ to 16×20″) require planning: choose a focal point such as a glowing cabin, a moonlit tree, or a snow-laden path. The focal point is the dominant visual anchor; everything else supports it. Start by blocking sky and ground in two large washes of color. This creates immediate depth and gives a working foundation for subsequent layers.
To read Christmas Crafts DIY: Handmade Projects Tutorial
Color mixing and layering techniques
Mix three values for each major color — dark, medium, and light — to suggest distance and volume. For example, a snow-dusted evergreen uses deep sap green for shadow, a mid-green for body, and a light, bluish-white for snow highlights. Layer from dark to light when using acrylics to preserve brightness and avoid muddy color. ✨
Painting a cabin: block the cabin silhouette in a mid-tone brown, then add roof details and window glow. To create a warm lantern effect, glaze a diluted orange over the window and feather outward with a soft dry brush for luminous edges. That single glazing step conveys immediate narrative warmth.
Compositional tricks and time-saving shortcuts
Use simple shapes to simplify complex scenes: triangle clusters for tree groups, rectangles for buildings, soft ovals for moon or lantern halos. A household sponge or an old credit card proves effective for texture—dragging or stamping shapes creates attractive, painterly foliage quickly. These hacks save hours while increasing visual interest.
Reference collections such as DIY easy Christmas painting ideas and the modern takes shown on easy Christmas canvas ideas offer visual templates that can be adapted to different color palettes and scales. Use those templates to plan compositions before touching the canvas.
Olivia’s craft-night variant for larger scenes: provide each participant with a simple sketch template and run a live demo for 10 minutes showing sky gradients and tree layering. After the demo, let participants paint their own focal point with a 30–45 minute open studio time. This guided structure increases completion rates and produces coherent group galleries.
Photographing results for social sharing: stage the finished canvas against neutral fabric, light with a shady window or softbox, and shoot at eye level. These small presentation steps make a painting look three times better in photos — crucial for Pinterest engagement and saving. 📸
Key insight: prioritize focal-point clarity and use shape-simplification plus quick texture tools to complete large canvas scenes with professional polish. ❄️
To read Christmas Wood Crafts: Rustic DIY Projects
3. Giftable Holiday Canvas Art: Mini canvases and budget-friendly projects that delight
Target the gift outcome first: a hand-painted mini canvas fits perfectly into stockings, envelopes, or a limited budget. This immediate goal shapes every choice — size, materials, and finishing. 🎁
Mini canvases (4×4″, 5×7″) are fast to paint and require minimal supplies, making them ideal for creating multiples. The average mini canvas project takes 20–35 minutes, so producing a set of five gifts becomes a realistic afternoon plan. Cost per piece can stay below $10 when using student-grade paints and repurposed ribbons.
Project ideas that photograph and gift beautifully
Mini nativity scenes, glittered tree clusters, ornament studies, and playful polar bears work well in small formats. For nativity silhouettes, use geometric shapes on a deep-blue field and add a small halo of yellow for the star. The simplicity of shape and color increases emotional resonance and production speed.
Use varnish or a matte spray to protect the painting; add a small gift tag tied with twine. These finishing steps transform a casual sketch into a cherished keepsake. Packaging matters: a simple brown box or a kraft envelope with tissue paper creates an elevated reveal without expensive materials.
For more step-by-step gift-focused ideas, explore the curated lists on 30 simple Christmas painting ideas and the seasonal projects cataloged at easy Christmas canvas painting ideas. Those pages provide templates that scale easily to mini canvases.
Olivia’s mini-canvas party technique: set up an assembly line with pre-mixed palettes in small paper cups for each color and a “finish station” with varnish and ribbons. This workflow reduces decision fatigue and increases completion. Guests leave with painted and packaged gifts in under two hours.
Display suggestions: create a gallery tray or a tiered shelf with small canvases grouped by color palette. Grouping multiplies perceived value and turns modest pieces into an intentional seasonal display. That visual trick offers big decorative impact for minimal cost.
To read Christmas Craft Ideas: Inspiration for All Ages
Key insight: decide gift function first, standardize supplies, and use an assembly-line approach to produce beautiful, budget-friendly holiday art sets. 🎨🎁
4. Mixed Media & Texture Techniques for Christmas Canvas Art — add sparkle and depth
Choose the texture that amplifies mood: glitter for sparkle, palette-knife impasto for rustic snowbanks, or metallics for a luxe finish. That decision shapes adhesives, varnishes, and layering order. ✨
Incorporating mixed media elevates simple Christmas paintings into tactile decor pieces. For glittery trees, apply a fine layer of clear-drying gloss where ornaments or snow will go, then sprinkle with iridescent glitter and set with a sealing coat. For thick snow drifts, load a palette knife with heavy body white acrylic and sculpt wave-like ridges. These tactile techniques change how light reacts to the surface and create a display piece that reads as handmade luxury.
Safe material choices and sealing strategies
Always seal glitter or loose materials with a spray varnish specifically labeled for acrylic mixed media. Avoid oil-based varnishes on acrylic layers. Use archival tapes and acid-free backing when framing canvases intended as gifts. These precautionary steps ensure longevity and reduce flaking over years of seasonal display.
Adding found elements — ribbon, a small pine sprig, or a tiny wooden button — introduces three-dimensional interest. Attach with hot glue on the reverse side of the canvas or a strong gel medium applied sparingly to maintain a sleek profile for hanging. These small anchors add narrative detail and make each piece feel intentionally crafted.
For inspiration on textural approaches and novice-friendly mixed media, review project rounds at Christmas canvas painting and experiment with ideas from festive project list. Those galleries showcase approaches that adapt across budgets and skill levels.
Olivia’s mixed-media favorite: a “glow-and-sparkle” tree where window glaze, metallic paint, and a dusting of glitter are combined. The sequence matters — glaze first, metallic accents second, glitter last — then seal. That order preserves color vibrancy and ensures lasting sparkle.
To read DIY Christmas Decor: Budget-Friendly Projects
Key insight: pick one texture to emphasize, learn the correct sealing order, and combine modest three-dimensional elements for high-impact decorations that last. ✨
5. Plan a Christmas Canvas Art Party and Seasonal Decor Strategy that actually works
Set a clear calendar target: plan 45–60 days before the holidays to allow for making, drying, framing, and posting for gifts. That timing is the single most effective move for stress-free seasonal art projects. 🗓️
Start by selecting 3–5 project templates and pre-cutting sketch guides. This reduces setup time and helps guests of mixed levels feel capable. Budgeting: estimate $15–25 per guest for supplies (canvas, paints, brushes, basic varnish). Use bulk buys for shared palettes to lower per-person cost. These planning details prevent last-minute supply runs and keep the event on schedule.
Host flow and roles
Designate a demo area, a drying rack station, and a finishing table with ribbons and tags. Run a two-phase schedule: 20 minutes of guided instruction, 35–45 minutes of free painting, and 15 minutes for finishing and packaging. This flow balances education with creative freedom and delivers high completion rates. 🎉
Photography and social sharing: set a styled photo corner with consistent lighting and neutral backdrop for finished pieces. Encourage guests to tag the event and add a printable instruction card to each gift that notes materials and care instructions — a small detail that adds perceived value.
For checklists and printable templates, consult resources such as seasonal project guides and whimsical lists like Christmas paintings art. These references provide templates and planning checklists that work for community or family gatherings.
Olivia’s seasonal strategy: host two planning sessions — one for supply prep and one for a practice demo — then a final craft party. This staggered approach spreads decision-making and creates momentum that reduces stress. Guests leave with framed art or neatly wrapped gifts and a shared sense of accomplishment.
Key insight: schedule early, standardize templates, and run a three-step host flow to turn a holiday painting session into a memorable and efficient event. 🎄
Further inspiration and diverse templates are available across several curated resources, including practical lists and advanced tutorials. Explore more ideas for techniques, themes, and scaled projects via festive project ideas, holiday party ideas, and the family-friendly prompts on baby Christmas crafts. These references round out a seasonal creative plan and supply concrete visual cues for every skill level.
Final action step: choose one project, gather the listed tools, and set a 60-minute block this weekend to produce a festive DIY canvas piece — then share the result and save this guide for next season. 🎨🎁